-->

This Page

has been moved to new address

henry happened

Sorry for inconvenience...

Redirection provided by Blogger to WordPress Migration Service
henry happened

Tuesday, May 31, 2011

First Shoes


Hello! I hope everyone enjoyed the long weekend as much as I did. I took a total blog break for four days, and wow, I needed that. We did lots of fun things like grill out, visit the zoo, and make our first (and second) trip to the pool.

So now that Henry is 15 months old, I think it's time for a pair of shoes. He's crawling, pulling up, cruising ... but not walking. And I really want him to (why?! you're probably thinking). Maybe these cuties from Pediped will inspire him?

Around the house I prefer that he be barefoot. But for errands and park visits, the boy needs some shoes. :)

What first shoes do you recommend? When did your little ones start walking?

Labels: ,

Thursday, May 26, 2011

DIY Hex Nut Wrap Bracelet


Yes, I know, I have to stop making bracelets. It's an addiction. Is there a support group for this? But I see these fun, colorful wrap bracelets everywhere, and they are sooo easy that even this craft-challenged mom can't resist.

And seriously J. Crew, $36 for this?


Step 1: Get thee to Goodwill and buy a crazy heinous skirt for $3. Then stop by the hardware store for a dozen or so brass hex nuts at 15 cents each. (You might want to pick up a few extra to make this bracelet.)

And you've shelled out about $5. (Why are all my projects $5? It's not a Lincoln conspiracy, I promise.)


Step 2: Cut a piece about 4 inches wide. Thinner is okay (not too much or it will just look sad), but you can't go much thicker because your hex nuts won't fit. Length can vary - the longer it is the more times it will wrap on your wrist. Also, the ragged edges are cool so don't stress about hemming or fraying.


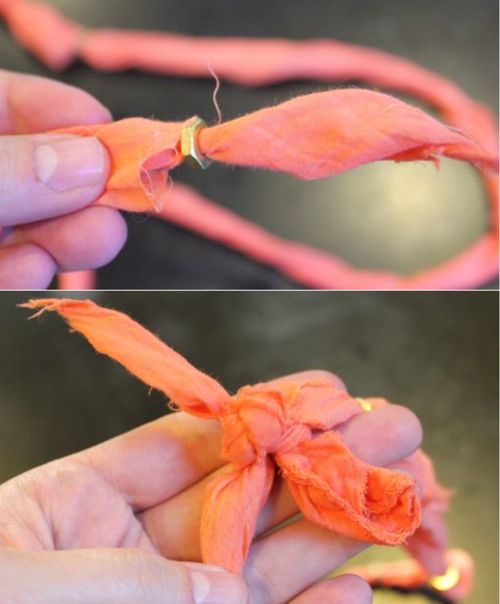
Step 3: Tie a knot in one end and twist the entire length.


Step 4: Feed your hex nuts on, spacing them however you want. Don't glue them on - the width of the fabric will be enough to keep them in place. Plus then you can adjust them after you put the bracelet on.

Step 5: Tie the two ends together in a knot so it forms a circle.


Step 6: Wind it around your wrist! You can move the hex nuts around for a better visual.


I love the chance to wear a bold color. So, obviously, I'm a bracelet person. What types of jewelry do you favor?

Labels: ,

Wednesday, May 25, 2011

The Maxi Trend

Recently my fashion advisory panel (Gwynnie, Kendi and Jill) have been sporting the maxi in skirt and dress form. Am I the last to recognize this trend?


I spent, oh, close to three hours browsing online to recreate their outfits so I thought I'd share what I found. Pretty much everything is under $100, and most are under $50. Cuz I'm cheap like that. :)


A few maxi dress options. The most expensive option is GP's "budget" find.


Zara long dress, $189 Free People cotton dress, $88 American Apparel a line dress, $58 Maxi dress, $50 Old Navy empire waist maxi dress, $35 Forever21 tank maxi dress, $10


I actually love the skirt more than the dress. Which do you prefer?

Velvet skirt, $88


Some heel and flat options. And I love the idea of putting a bright top or neon tank underneath.

American Apparel rib tank top, $46
Old Navy rib tank top, $8.50
Gap shoes, $90
Kvoll shoes, $62
Old Navy wedge sandal shoes, $30
Lace up shoes, $28
Dorothy Perkins blue platform heels, 22 GBP
Kimchi Blue strappy shoes, $20
Wet Seal snake shoes, $20

What do you think of this trend? Or are you already onboard?

Labels:

Monday, May 23, 2011

DIY Cuffed Jean Shorts


Got a pair of jeans that make you look fat? Oh the therapy that comes from ripping them apart. But seriously, you can save yourself some big bucks this season by making not one - but two! - projects from one pair of jeans!

First, shop your closet for a pair of jeans that are too long, too short, too whatever to turn into cute cuffed shorts. Or thrift a pair like mine above - Loft boyfriend jeans for $7.

Second, gather supplies. You will need:

  • Pair of jeans
  • Scissors (shearing scissors if you have them for less fraying)
  • Tape measure
  • Pencil
Third: Decide how long you want the shorts to be. This momma does not really wear short shorts so I erred on the longish side when cutting. Measure the inseam allowing an extra 2 inches for folding and mark your length. TIP: Lay the legs on top of one another so you only have to cut once. D'oh!

I started by cutting at 10 1/2 inches, went back to cut at 9 1/2 and finally again at 8 1/2. So that's roughly 6 1/2 inches of length after rolling. But these jeans are pretty baggy so they sit low on the waist.


Next: Cut a triangular notch about 1 inch high on the outside of each leg. You need some give in order to roll the pants. Otherwise you'll get some unsightly bulges, a la muffin top.


Almost there: Put them on, roll twice, and assess length. Are they even? Does the length feel right? Wear them around for a bit to see how they feel. After an hour of wearing mine I decided they needed to be a smidge shorter so cut a bit more.


Sorry, no full body shots. These legs are too lily white! But seriously, could that be any easier?

Finally: Don't throw away the denim scraps! DIY project #2 is coming up.


Labels: ,

Sunday, May 22, 2011

Steppin' Out: What Not To Wear


Nothing like a photo to ruin a good run of denial. I took one look at this pic and literally came inside and got on the treadmill.

And this weekend I destroyed those jeans. Apparently I'm dating a largish fellow if these are my "boyfriend" jeans.

But I do still like the scarf and earrings that I got for Mother's Day. (Ok, I returned my actual gift and got these - feel a wee bit guilty about that.)

I've been wanting to link up (you know how I love a good link up) with Steppin' Out over at Harper's Happenings. So I tried again on Saturday for a decent "outfit." I'm apparently a masochist because I chose horizontal stripes in a rather non-flattering tunic. Without serious Spanx support. Those photos are safely buried. And I have a new item for the consignment store!

Making me feel marginally better (though a cookie would be better): At least the Loft jeans were thrifted and ripping them apart felt really good (DIY to come).

Plus I'm back on the exercise bandwagon. I feel really good that I lost all of my baby weight (47 pounds, yikes!). Now my goal is Just 10 More and I will be a happy, skippy gal.

Labels:

Wednesday, May 18, 2011

mom style | Meet Maria

Meet Maria Schaefer, a full-time working mom who always manages to look chic and pulled together. Since I have no clue how this is done, I asked her to share her shopping secrets. Check out her key wardrobe pieces - some seriously good advice in there!

Major bonus: Henry is so lucky to have inherited some of her little man Carsten's super stylin' hand-me-downs!


Mom staple that you always wear:
My diamond cross necklace that hubby got me as a gift when we found out I was pregnant with little man. It's a very special reminder of my family especially when I'm at work or away from them.

Key pieces in your closet:  
  • A fuschia scarf that I wear year-round; my mom gave it to me because she thought I wore too much black.
  • A practical baseball cap for those early morning errands and gym time.
  • A selection of ballet flats.
  • Different jean styles -- skinny, wideleg, flared, bell bottoms, boyfriend. No mommy jeans and no jeggings.
  • H&M basic tees in gray, white and black -- so versatile, especially with the scarf.
  • Funky jackets which are my proxy for a sweatshirt.
  • A selection of casual and comfy dresses perfect for travel, errands, picnics or a pick-me-up during those "I feel ______ <---- insert adjective: fat/frumpy/crappy" days. They're also perfect for hiding the post-baby bulge.  
  • And lastly, a wide selection of flip flops.
Color palette that you stick to:  The neutrals like black, white, gray, and plum. Whenever I can, I spice it up with a splash of bright color with my belt, earrings, bangles, shoes and bags. I never carry black bags unless the occasion calls for it, and I only wear black shoes to work.

Final touches to complete your outfit: Anything with color to juice it up. I'm also in love with bracelets, bangles and cuffs lately.

Favorite places to shop: H&M, Piperlime, Forever 21, Benetton, BCBG, Ann Taylor, Loft, NY & Company, Bebe, Banana Republic, and TJ Maxx

Shirt: Forever 21, Jeans: Diesel, Shoes: Naturalizer, Sunnies: D&G 

What you want to buy now for you and/or Carsten:  For me...nothing really. I used to love to shop, but since having a child, I find that I'm always just buying things for him or my hubby whenever I'm out. For Carsten, I'd love to start getting him cute summer clothes but I can't yet because he's so tiny and can still wear his summer clothes from last year. In the meantime, on my list for him are a couple of dock shoes (those cute Sperry's are to die for) and everything madras plaid and nautical striped.


Labels: ,

Monday, May 16, 2011

review | Costume for Princess In Training


Remember our royal tea party? Well, there was another princess (besides Kate) that day.

Caroline totally hammed it up in her new Cinderella Toddler Costume. The blue satin was so pretty. But she loved the extras that came with the outfit: sparkly tiara, long white gloves and a blue ribbon necklace.

The outfit was easy for her to step into (very important for dress up), and she could pull on the gloves and fasten the velcro necklace on her own. And I loved that the outfit was blue (not pink).


The tiara stayed on long enough to get a picture with Princess Gigi.


Now I have to get the Cinderella shoes to complete the ensemble!

The costume was provided from Costume Discounters, which has tons of great toddler Halloween costumes - especially if you are looking for a Disney Princess costumes. Free shipping both ways makes it easy to get the right size. And I have a feeling that someone is going to want to want the Tinkerbell outfit for Halloween this year.

What costumes have your kids loved? Or do you make your own?

Labels: , ,

Saturday, May 14, 2011

wear | $25 Jewelry Giveaway CLOSED


Yay! Another fabulous giveaway. I am super excited to introduce Christy from The Noisy Cricket. Her jewelry creations are AH-MAY-ZING. Each one is individually hand crafted and stamped one letter at a time.


A friend introduced me to her designs and they were a perfect fit for Mother's Day. I love the idea of wearing something so special every day. I have to get one of her creations (probably the circle of love) to keep my kiddos close by. The pieces are so classic and easy to wear with anything: jeans or a suit. And I love that it's a mother of 5 soldering and hammering the metal.

Now you can win a $25 credit to The Noisy Cricket to pick out your own favorite design! Entry details are below, but first let's learn a bit more about Christy and her Esty shop. 

Tell us about your name, The Noisy Cricket

The Noisy Cricket is a name my husband and I came up with while brainstorming business names one night. For me crickets are such a wonderful reminder of warm summer nights and with five crazy kids running around the house it is always noisy, hence the name noisy cricket. 

What inspires you?

When creating I find inspiration is so many things and I love working with all kinds of media. Metal and fabric are my favorites. They couldn't be more opposite, but I love working with both and have a sketch book full of designs I'm working on.

I have so much fun creating my personalized jewelry line. I love being able to wear my kid's and husband's names close to my heart. With each piece of jewelry I create I enjoy seeing a small window into my customers world. It is so fun to see someone celebrating the birth of a child, the excitement of a wedding or displaying the ones they love.


What's your bestselling item? Your favorite?

One of my most popular pieces is my mixed metal layered disc. It is a little more on the rustic side and is nice for those who may not wear strictly sterling silver. It is also easier to incorporate longer names that some other styles may not fit. I have a hard time picking my favorite. It often depends on my mood. I wear my hammered names around pearl quite a bit but am wanting to make myself the teeny tiny initials. I think these are so petite and darling and love the way the dangle from the chain.


Thank you Christy! Here's how you can win a $25 credit to The Noisy Cricket!

*** This post disappeared while Blogger was down. But I still have your comments so if you already entered, it will be included in the entries.

Mandatory Entry

Visit The Noisy Cricket and tell me your favorite design.

More Ways to Enter

1. Follow henry happened via GFC or RSS

2. "Like" henry happened on Facebook or follow on Twitter.

3. Tweet, blog or Facebook about this giveaway

* Contest will be open until Midnight EST on Sunday, May 22. Contest winner must have a US or Canadian mailing address.

* The winner will be randomly selected from random.org and announced on Monday, May 23. Please check back to see if you won, or leave your email address with comment.


Labels: ,

Wednesday, May 11, 2011

wear | Calypso St. Barth Knock Off


Browsing the Calypso St. Barth line at Target the other day, I saw this lovely woven bracelet. I mentioned my obsession with them here, and this looked WAY too easy to spend $20 bucks on. (It says $15 online but I swear it was more at my Target.)

Quick aside - I didn't end up buying anything from the Calypso collection. It was expensive! I tried on one tunic top and could not cough up over $30 for it. I mean, really, this is STILL Target people.

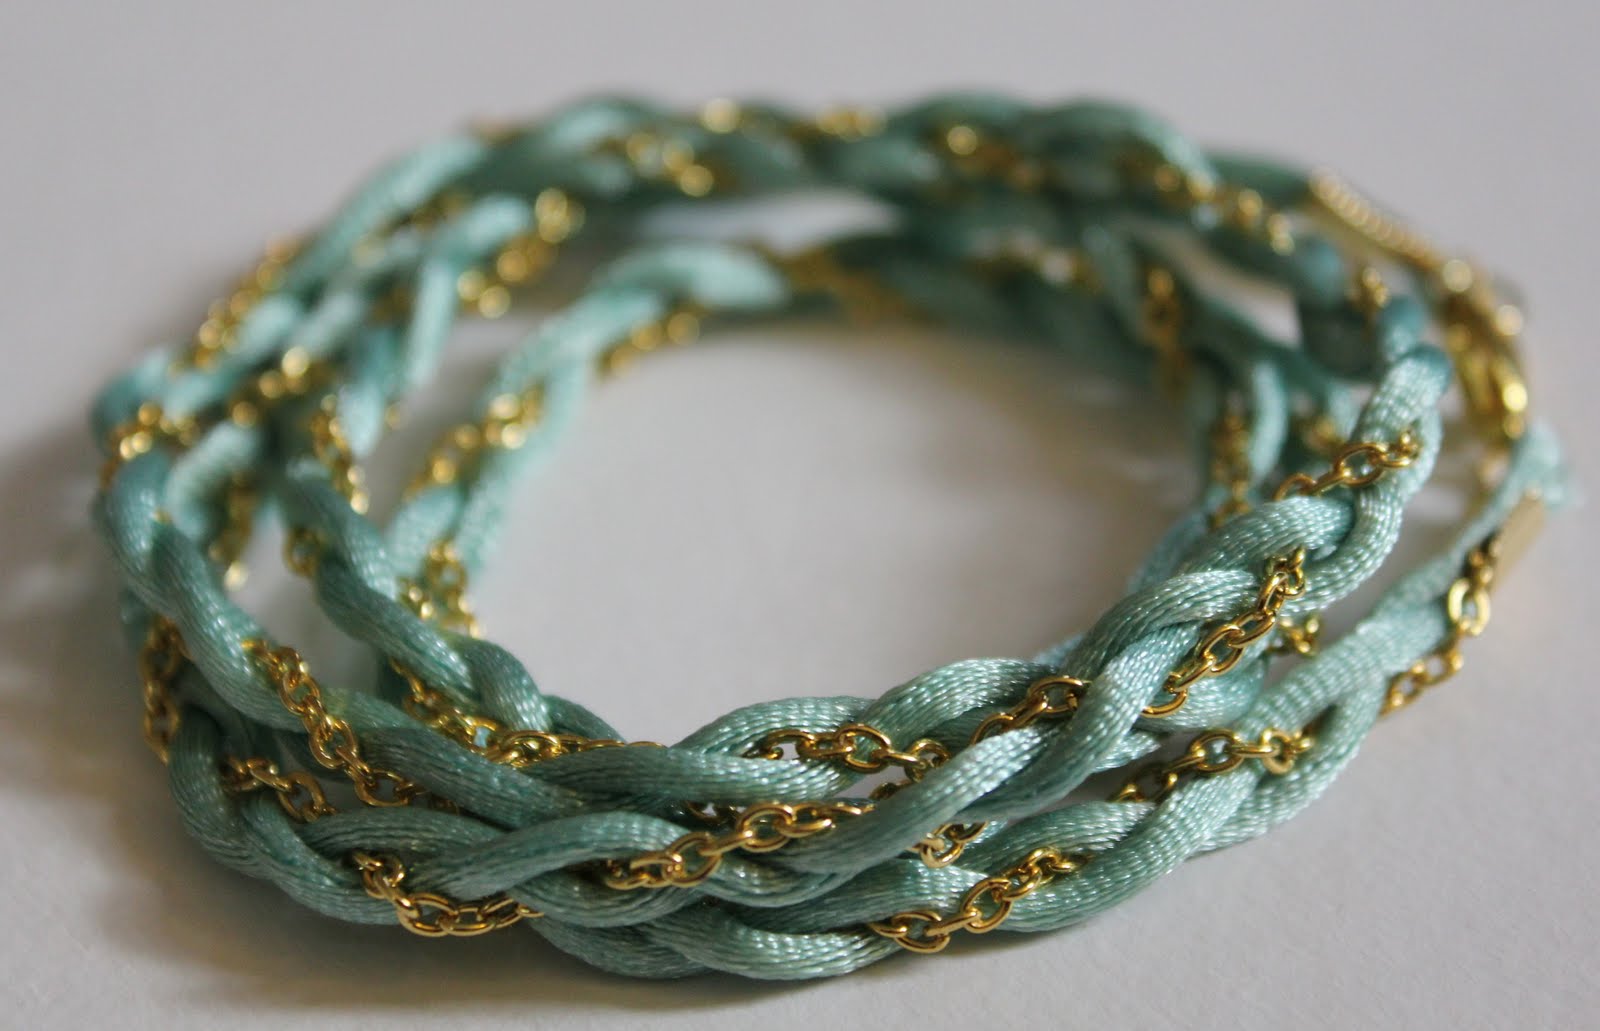
But back to the bracelet. I paid $2.37 for the ribbon (bought 3 yards, only needed 2) and $2.79 for the chain. It literally took less than 5 minutes to make.


Get 2 yards of whatever color ribbon you like and small link gold (or silver) chain. I used ribbon clamps that I had on hand and a lobster claw thing for a closure.


First, wrap the ribbon around your wrist the number of times your plan to wear it to measure the length. (Add a bit more for a cushion.)  

Then cut the ribbon into two equal lengths. Cut the chain to the same length. Attach together with a rubber band or a ribbon clamp. Then anchor and start braiding! Soooo easy!

An up close of what I used for the closure.


I love it as a wrapped bracelet but makes a great necklace. I braided this version more loosely.


P.S. The winner of the $50 Target gift card is #143, Rob! I will email you for your address!


Labels: ,

Sunday, May 8, 2011

how to | $220 Bracelet for $5

Embellished wrap bracelets are everywhere, and I am kind of obsessed with these colorful Chan Luu ones right now. But $220?


Yikes! I think we can make our own for a wee bit less. Less than $5 in fact!


All you need is about 3 yards of ribbon and 2 dozen gold beads. I, of course, went with purple but any color would look great.


Cut the ribbon into 3 equal lengths. Start by braiding about 6 inches of ribbon and then secure the end with a rubber band. Anchor the end with something heavy to hold in it place.

Start braiding in the beads by feeding the ball onto the middle strand and then tightly braiding the other two strands around it. Continue feeding beads onto the middle strand until you run out (I had about 25) or until there's about 6 inches of ribbon left.


Finish with another 6 inches or so of braiding. Then clamp the ends with ribbon fasteners or just tie it in a knot.

It looks great as a bracelet or a necklace!


Labels: ,