-->

This Page

has been moved to new address

henry happened

Sorry for inconvenience...

Redirection provided by Blogger to WordPress Migration Service
henry happened

Thursday, May 26, 2011

DIY Hex Nut Wrap Bracelet


Yes, I know, I have to stop making bracelets. It's an addiction. Is there a support group for this? But I see these fun, colorful wrap bracelets everywhere, and they are sooo easy that even this craft-challenged mom can't resist.

And seriously J. Crew, $36 for this?


Step 1: Get thee to Goodwill and buy a crazy heinous skirt for $3. Then stop by the hardware store for a dozen or so brass hex nuts at 15 cents each. (You might want to pick up a few extra to make this bracelet.)

And you've shelled out about $5. (Why are all my projects $5? It's not a Lincoln conspiracy, I promise.)


Step 2: Cut a piece about 4 inches wide. Thinner is okay (not too much or it will just look sad), but you can't go much thicker because your hex nuts won't fit. Length can vary - the longer it is the more times it will wrap on your wrist. Also, the ragged edges are cool so don't stress about hemming or fraying.


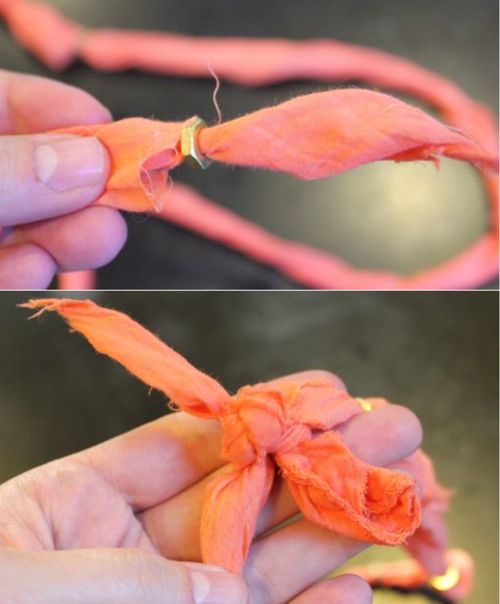
Step 3: Tie a knot in one end and twist the entire length.


Step 4: Feed your hex nuts on, spacing them however you want. Don't glue them on - the width of the fabric will be enough to keep them in place. Plus then you can adjust them after you put the bracelet on.

Step 5: Tie the two ends together in a knot so it forms a circle.


Step 6: Wind it around your wrist! You can move the hex nuts around for a better visual.


I love the chance to wear a bold color. So, obviously, I'm a bracelet person. What types of jewelry do you favor?

Labels: ,

Monday, May 23, 2011

DIY Bell Bottom Jeans

Remember my ugly jeans? When life gives you an extra 10 pounds lemons, I say make lemonade! First we turned them into cuffed jean shorts. And guess what we're using the leftover scraps for? Yes, bell bottoms!

The flair trend is great for us pear shapes for a couple of reasons. First, it balances the hip width. And second, it forces me to wear heels for desperately needed height!

Enough rambling, ready for the how to? This one is a bit more complex than the shorts so stay with me. You will need:
  • A pair of fitted jeans (not jeggings but not baggy)
  • Denim scraps from making shorts
  • Seam ripper (scissors will also work)
  • Scissors or fabric cutter
  • Sewing machine (or a friend with one, thanks Nikki!)
  • Pins

First, open the outer leg seam of the jeans. I went up about 18 inches, which was not quite knee height. I used a seam ripper to get started and then just ripped it to where I had marked. I also opened about an inch of the hem on each side of the seam.  

You can open the entire hem if you don't want to re-hem at the end. This will just add about an inch to the length. Clean up the open seam and pull out the loose threads.


Next, take your bottom denim pieces from making the shorts. Cut down the side seam to open up the fabric into one flat piece. Now fold over and measure 18 inches.


This is the slightly tricky part for me. You are basically cutting a triangle piece to sew into the leg seam. You want the base of the triangle to be 6 inches wide and the top to be 2 inches wide. (Of course, you can go wider if you want more flare.)

After you fold over the fabric, use a ruler to mark 1 inch in at the top and 3 inches in at the bottom. Then draw a line to connect or use a ruler and cut on the diagonal to make your triangle.


The next piece is easy because you can just use the first one as your guide. Then put them together to see if they match up (right side facing in) and trim up an errors.


Now turn your jeans inside out and pin in the fabric triangle, making sure you match up the end open hems. Then sew it in.


Finally re-hem. You may have to do this by hand if your sewing machine won't go through the denim layers.

Voila! Super cute bell bottoms! I kinda wish I had gone even wider ... though I'm not quite ready to try any crazy fabric quite yet.


What do you guys think of this trend? Is it something you would wear?


Labels: ,

Tuesday, May 17, 2011

The Coolest Rosette and Tie Pillow Tutorial

So I am a little bit of a link party addict. I LOVE them. I find the coolest projects and blogs while hopping around. When I spotted these adorable pillows I knew I had to make them. I love that they 1) give me another reason to go to Goodwill and 2) are perfect for sewing novices. Thank you so much to Natalie for sharing a tutorial for 2 awesome pillows! Go check out her site,  A Turtle's Life for Me!

*******

I was so excited when Stephanie contacted me to guest post here on Henry Happened. It's got me feeling all sorts of special!

I'm Natalie and I blog over at A Turtle's Life for Me. A couple months ago, I borrowed my sister's sewing machine (and, yes, I still have it! Shhhh!!) and for my first project, I made a couple of pillows.


So today I'm here to give you a tutorial on how I made them. I'm still figuring out this sewing business so there won't be any technical terms here, but hopefully you'll be able to follow along anyways.

I make my pillow covers with a flap in the back so I can remove the pillow inserts and change out the covers whenever I want. My pillow forms are 16x16, and I like them to look really full so I cut my fabric to be 16x16 as well. I figure with the seams, this gives me about a 15x15 "hole" for the pillow so it looks nice and plump! This could be modified depending on how you like your pillow to look.

Let's start with the tie pillow. First step, go to your thrift store and find an old tie for cheap. I pay about 50 cents for mine, and I like the ones that are old-fashioned looking. Then I try to find a coordinating fabric that has more of a feminine quality. I just like the contrast of the feminine print with the old manly tie.

Then I cut one piece of fabric 16x16 for the front panel. The next piece I cut 16x22 for the back panel.


On the 16x22 panel. Cut it into 2 sections - I would guess I make one piece about 14" wide and the other piece 8" wide, but there's no set measurement it has to be.


Then take those inside 16" sides and iron the hem down. This is going to be the flaps for your pocket opening.


Next take the 16x16 front piece and line your tie up. Place it however you like, but I always seem to put mine off-set. Just make sure you allow for the seams. Cut off the excess, pin it down and sew it on! I like the contrasting thread with the dark tie, but you could make it blend if that's your preference.


Then put all your pieces together with the fabric facing in and pin in place. (Notice how my bottom piece is NOT facing the right way!  Uh, yeah, maybe I should view my pics before I start sewing!!)


Sew around all 4 sides and once you're finished, I trim off all 4 corners. This makes sure you have nice sharp corners when you turn it right-side out.


Stuff your pillow insert in and then get started on the next one! 


For the rosette pillow, I follow the same steps as above. Except instead of sewing a tie onto the front panel, I sew a felt circle on.


Then I sew the back pieces to the front piece like I did with the tie pillow, and you'll end up with a pillow cover that looks like this.


For the rosette, cut a strip from the same material. About 1.5" wide and as long as you can. The longer you're able to cut it, the bigger your rosette will be!


To make the rosette, fold your strip in half.


Then fold down the top edge in a triangle shape.


Take that triangle and fold it down again. This will be the center bud of your rosette.


Then put a dab of hot glue in the center of your felt circle and place your bud down nice and firm.


Then just keep twisting your strip of fabric and hot gluing it down as you go around your rosette.  It's totally up to you how tight or loose you want to make it.


Notice in the pic above that when I sewed my felt circle down, I didn't sew it right at the edge. That's because when you run out of your fabric strip to keep building your rosette, you'll probably end up with some felt that hangs out over the edge of the rosette. Since you didn't bring your stitch right to the edge, you can carefully take your scissors and trim away all this excess felt.


Then stuff your pillow inside and you're finished!


Two pillows down and it only took me an hour! And, yes, remember, I did put the front piece facing the wrong direction on the tie pillow and had to completely do it over. And, yes, I may have gotten frustrated and then turned around and have done the exact same thing with the rosette pillow!  But, only an hour here people, and I have two cute little pillows to show for it!


Thanks again, so much for having me, Stephanie! And I hope the rest of you will take a couple minutes and hop on over to A Turtle's Life for Me to say hi! Lots of other crafts, sewing projects, cake decorating and more going on, so don't miss out!

******* 

Thank you so much Natalie! I love that groovy tie - Father's Day gift idea, anyone?? Now go visit A Turtle's Life for Me. :)

Labels:

Monday, May 16, 2011

how to | Fresh Herb Spirits & Cocktails


I'm not sure what is says about me that one of the first things I did with my new herb garden was think about all the fun drinks & cocktails I could make.

Infused spirits is just about the easiest kitchen trick I've found. Simply pick a few herb leaves (wash & dry them), put them in a jar (I used my yogurt making jars) and fill with alcohol. You want enough alcohol to fill the container. I made one batch with a half full jar and it smells a little off now.

How about basil vodka? (Fabulous recipe in upcoming post!) Or dill vodka? (Don't be a doubter - see yummy Bloody Mary recipe below!)


And of course I made several versions of mint infused rum. This one is chocolate mint.


Let the jars sit for 3-5 days and then strain herbs.

I'm a little obsessed with lemonade lately. Here is one super easy recipe I came up with for a refreshing treat. The mint was super tasty and mixed well with the tart lemonade. So much easier than having to pulverize mint leaves over and over.


Spiked Mint Lemonade

1 ounce mint infused rum
Fresh lemonade
Sparkling water

Add maybe half a cup of water and lemonade to the rum (add more water if too strong). Stir and serve over ice. I made mint ice cubes with leftovers from soap making so there's a bit of extra diced mint in there. Garnish with mint leaves.

Dill Vodka Bloody Mary
Recipe from Algonquin

2 oz Dill Vodka
4 oz Tomato Juice
Juice of 1/2 Lime
1 1/2 tsp Worcestershire Sauce
6 dashes Tabasco Sauce
Salt
Pepper
1 Lime wedge

Add vodka, juices and sauce to a shaker with ice, adding salt and pepper to taste. Shake vigorously. pour over ice into tall glass and add a lime wedge.


Labels:

Wednesday, May 11, 2011

wear | Calypso St. Barth Knock Off


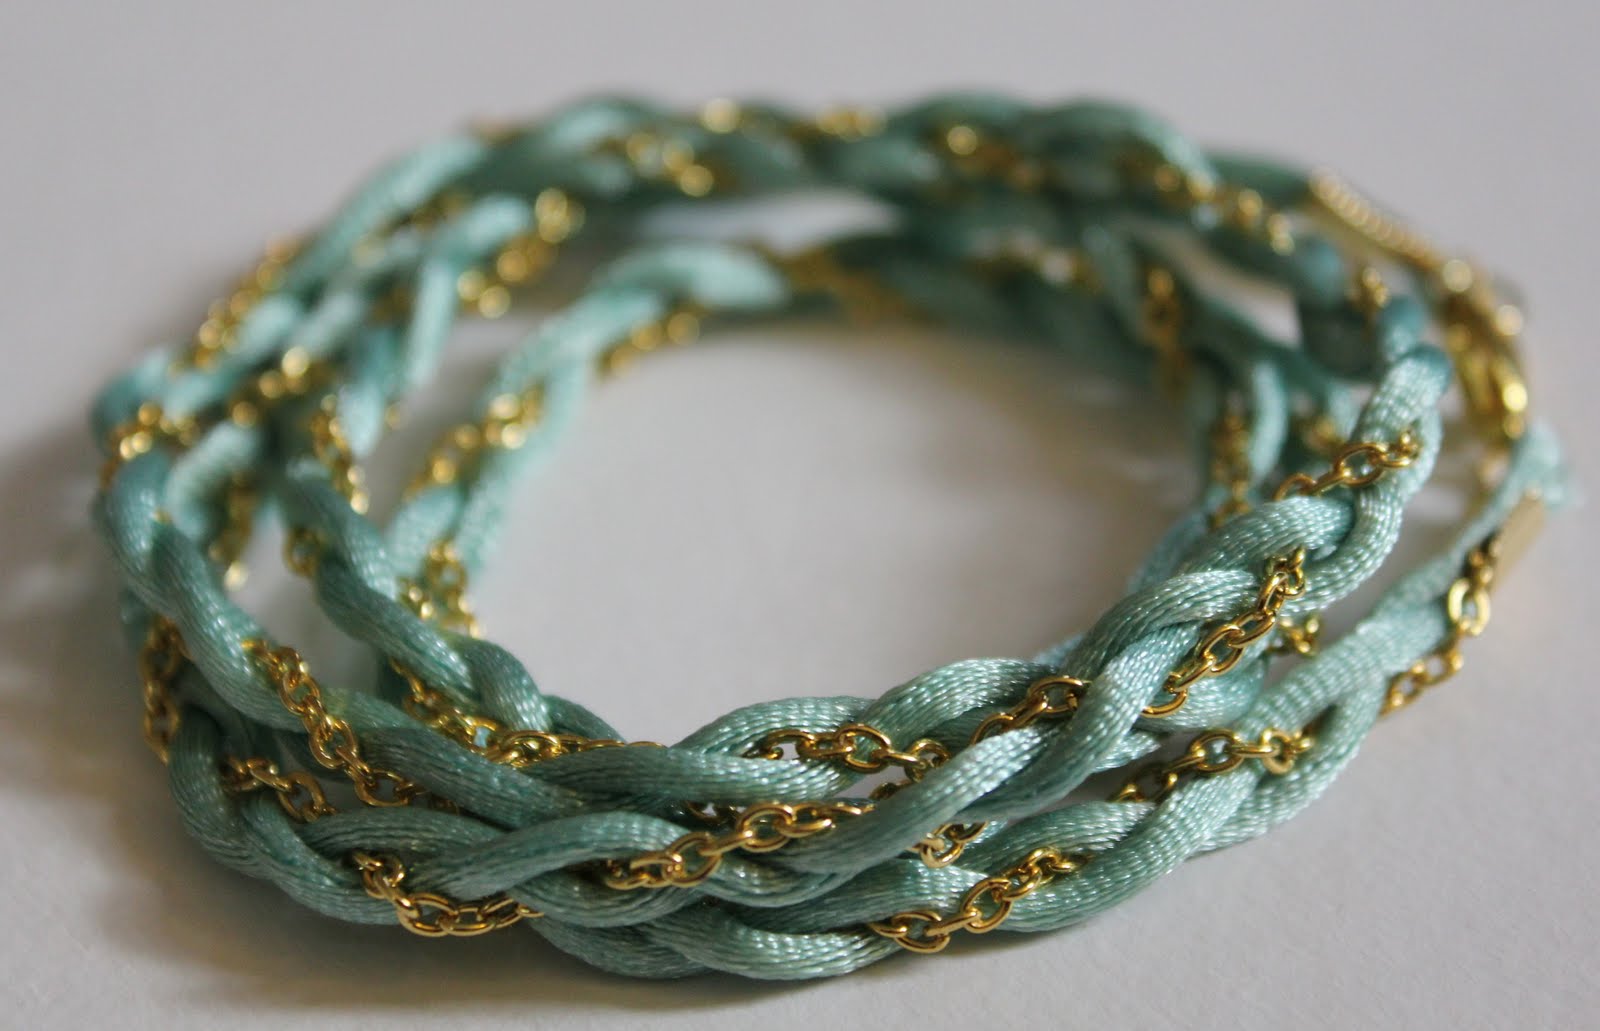
Browsing the Calypso St. Barth line at Target the other day, I saw this lovely woven bracelet. I mentioned my obsession with them here, and this looked WAY too easy to spend $20 bucks on. (It says $15 online but I swear it was more at my Target.)

Quick aside - I didn't end up buying anything from the Calypso collection. It was expensive! I tried on one tunic top and could not cough up over $30 for it. I mean, really, this is STILL Target people.

But back to the bracelet. I paid $2.37 for the ribbon (bought 3 yards, only needed 2) and $2.79 for the chain. It literally took less than 5 minutes to make.


Get 2 yards of whatever color ribbon you like and small link gold (or silver) chain. I used ribbon clamps that I had on hand and a lobster claw thing for a closure.


First, wrap the ribbon around your wrist the number of times your plan to wear it to measure the length. (Add a bit more for a cushion.)  

Then cut the ribbon into two equal lengths. Cut the chain to the same length. Attach together with a rubber band or a ribbon clamp. Then anchor and start braiding! Soooo easy!

An up close of what I used for the closure.


I love it as a wrapped bracelet but makes a great necklace. I braided this version more loosely.


P.S. The winner of the $50 Target gift card is #143, Rob! I will email you for your address!


Labels: ,