-->

This Page

has been moved to new address

henry happened

Sorry for inconvenience...

Redirection provided by Blogger to WordPress Migration Service
henry happened: April 2012

Tuesday, April 24, 2012

DIY Bobby Pins - Neon, Glitter and Sparkle


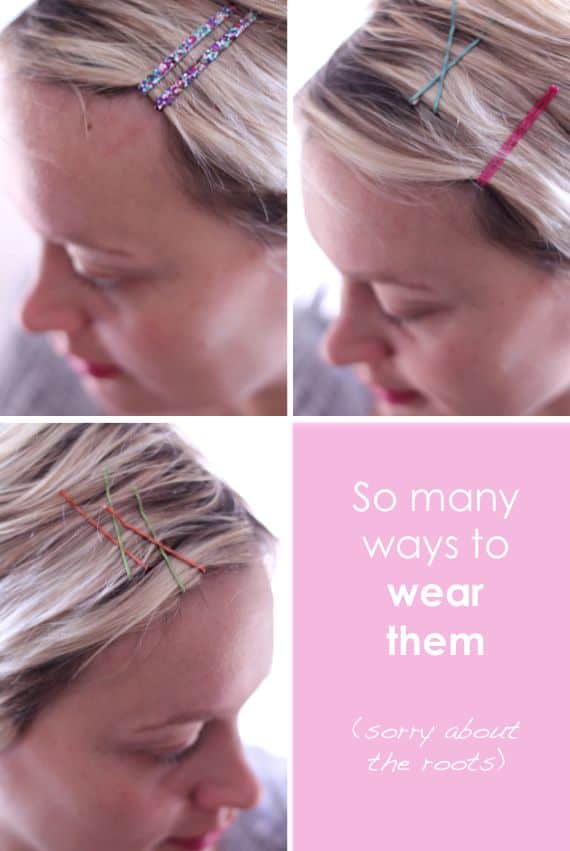
With so many fun bobby pins floating around (see here or here) I was determined to DIY some colorful ones for myself. For those of us with crazy short hair, blinged out bobby pins is where it's at.

When spray paint didn't work I used Anna's idea of painting with nail polish. Voila! And one you get started painting these little guys, you get addicted! So I made three versions - neon, glitter and sparkle.
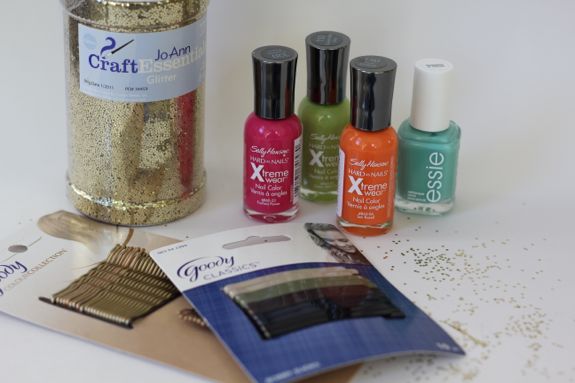
   

Instructions are super easy.

For neon:  

1. Slide the bobby pins onto cardboard or paper to make them easier to paint. Otherwise they fall over pretty easily, making them hard to paint. Learned this one the hard way.  

2. Paint two coats of neon nail polish, drying in between.

3. Apply top coat (optional).  

4. You don't need to to paint the back of the bobby pin - once it's in your hair no one will see that part.


For glitter:  

1. Paint the top of the bobby pin with clear polish. Or you can use Mod Podge.  

2. Make a little pile of glitter and dip the top of the bobby pin in.  

3. Let dry and apply another coat of polish or Mod Podge.
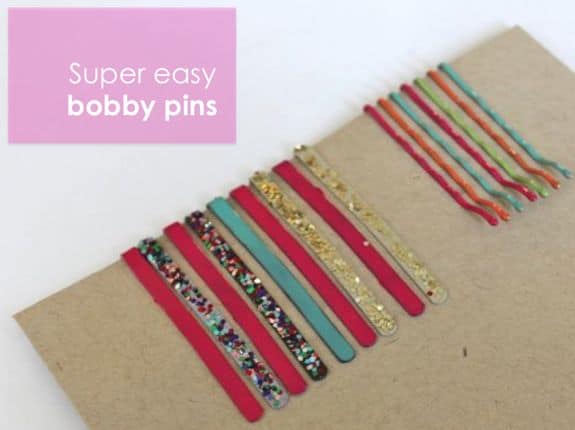
   

For sparkle:  

1. Glue on a strip of rhinestone trim the length of the bobby pin. I used Tacky Glue because it dries clear.  

2. Wind any kind of trim between the rhinestones. I used what I had on hand - neon rope from Home Depot and mint colored crochet thread.

 3. Glue the ends of the thread and snip off any excess.
 

Monday, April 23, 2012

Momiform | Hospital Outfits


We were in major "get ready for baby" mode this weekend. Henry's room is almost ready for a roommate (can't wait to show you!) and I think we have everything we need. By the way, it's amazing how much LESS stuff we've purchased for baby #3. Being the planners that we are, we gave away most of our infant equipment - swing, Bjorn, bouncer, etc - and most of it we've realized we don't need. Or we bought it used or borrowed this time around.  

Now to get ready for the hospital...

I am the worst at planning ahead for this kind of stuff. Hence zero in-hospital pictures of me with either of my kiddos. This time around I'm determined to get a decent photo of me and the baby.  

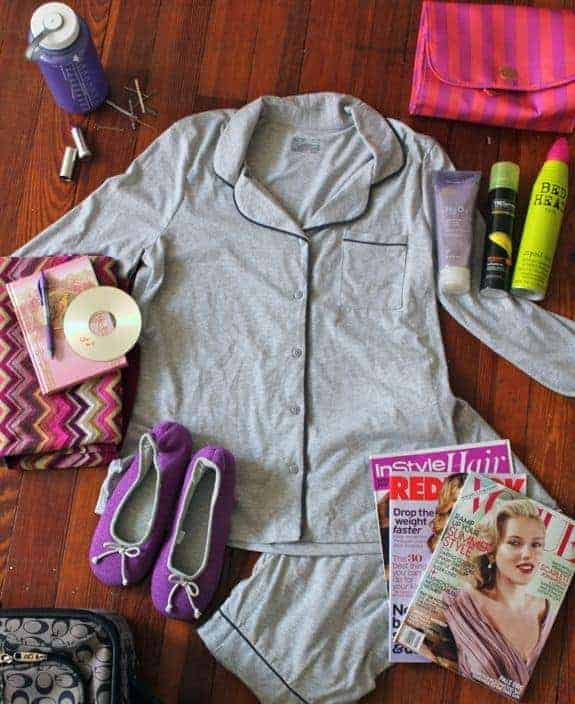
In-hospital outfit:
  • Button up pjs - Oh so nice to wear something comfy that is also breastfeeding friendly.
  • Slippers - For making the waddle to the bathroom at 2 a.m. a little easier.
  • Labor mix CD - Mark made this for Caroline's birth, and the doctor remarked that she'd never delivered to Madonna before.
  • Dry shampoo, lipstick, bobby pins - My day 2 camera ready plan.
 

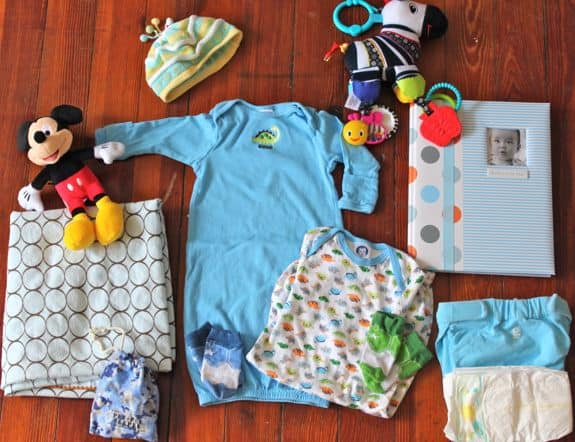
Packing for baby: Baby doesn't really need much at the hospital because I love the little hat and burrito blanket they keep baby in. But you need a little something for photos and going home.
  • Baby book - I'm terrible at keeping up with baby books but those little footprints are a must.
  • Gifts from siblings - The kids had a blast picking out a little something for the baby this weekend. I want to pack them to make sure I have them on hand when they visit.
  • Favorite blanket & gown - I've never been a big fan of grown-up looking going-home outfits for a 2-day old. These are my favorite baby gowns and swaddling blankets that I give to every new mom I know - they are life savers!
 

Going home outfit:
  • Favorite maternity outfit - It's so depressing to come home in maternity clothes. I'm so sick of them all that I want to have a bonfire in the backyard. But this is my most comfortable go-to.
  • Nursing tanks - I will live in these Target tanks for the first year.
  • Red lipstick - All the glam I need!
Other hospital must haves:
  • Camera - not pictured (in use!)
  • Goody basket for nurse staff - I always mean to send a thank you to the nurses and, of course, get home and lose my mind. This time I'm bringing an easy muffin/fruit concoction with me.
  • Champagne - Definitely a must for toasting the new arrival.
What am I forgetting? Let me know what worked for you!

Wednesday, April 18, 2012

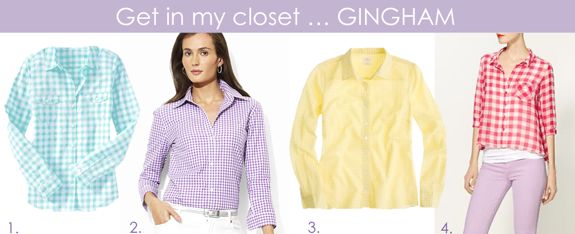
Get in My Closet | Gingham

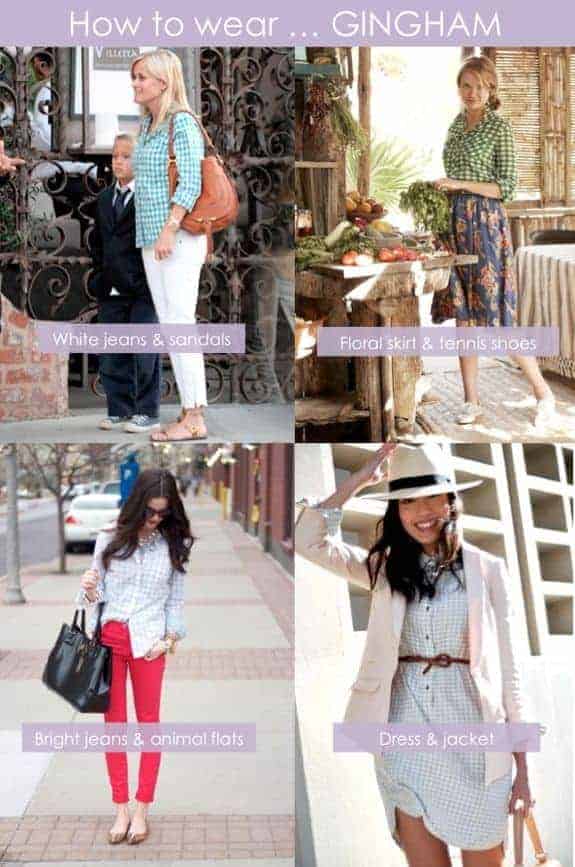
I saw Reese Witherspoon in this cheerful gingham print in Redbook and got so excited when I found a cheap version from Old Navy. I need a button down in all of these happy colors.

On another note, does it mean that I'm old if I read Redbook? And really like it?


1. Old Navy, $24.94

2. Lauren by Ralph Lauren, $89.50

3. J. Crew, $75

4. Free People, $88

Tuesday, April 17, 2012

5 Step Lip Prep for Bright Lipstick


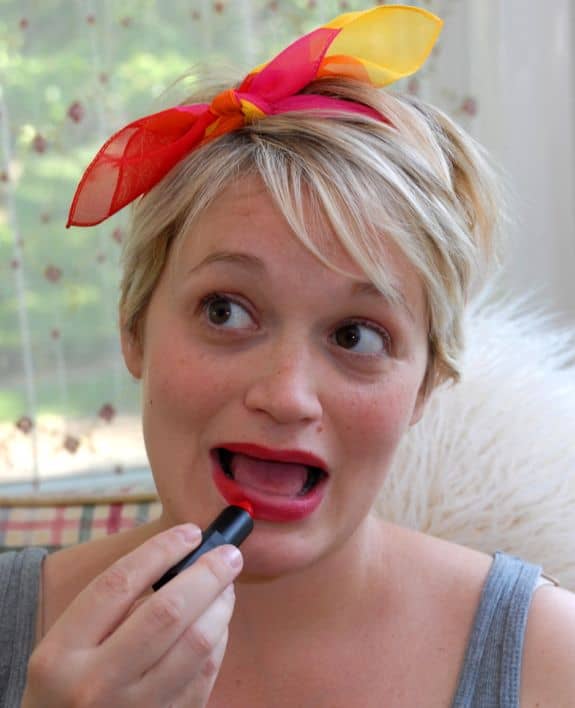
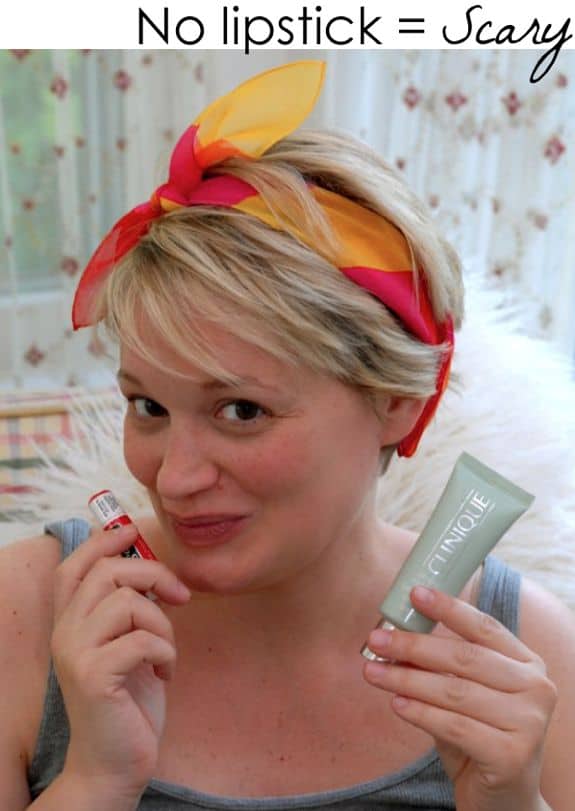
Bright lipstick has become my new best friend. And I went nuts last week trying new shades at Sephora and stalking Walgreens for cheaper versions. (It's a good thing they have an awesome return policy.)

But matte, long-lasting lipstick wreaks havoc on the lips - and a cakey, dried out smile is so not pretty. So I did a little online research and asked the ladies at Sephora to dish a few tips on how to prep your lips for wearing bright shades.

1. Start by exfoliating.

Grab your coconut oil and mix it in your hand with a little sugar. Scrub your lips with your finger and then rinse. Note: this is a great time to give your hubby a smooch - your lips will feel all plump and kissable and you'll smell like a yummy cocktail.

2. Moisturize with lip balm.

You want your lips super moisturized so swipe on some Chapstick or other lip balm to keep 'em soft.


3. Dab on a coat of foundation.

This was a revelation to me! A base coat of foundation helps the color stay on longer and maintains the true lipstick color. And your lipstick won't settle into your lip lines (so gross). So skip the lip liner and use a little foundation instead.

4. Stick with a matte shade or a long-lasting formula.

One of the more irritating aspects of bright lipstick is that it tends to disappear as soon as you eat or drink anything. So a bright lip gloss will probably look the way you want it to for about 60 seconds.

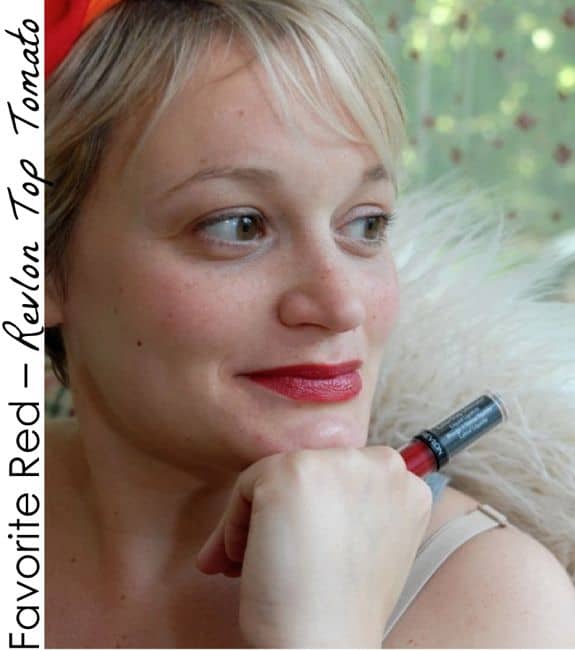
Regina turned me on to Revlon's ColorStay Ultimate Liquid Lipstick and it is crazy long-lasting. This is my favorite shade - Top Tomato.


5. Apply gloss in the center of the lips.

I dab of bit of clear gloss to the center of my lips. It keeps lips from feeling dry and enhances the color.

6. Don't be afraid to try the trendy shades.

If I was wary of hot pink, then I was completely skeptical of purple. But I love it! It looks great on non blond/fair complexions too so give it a try. This is Lancome Rouge in Love in Violette Coquette.


Friday, April 13, 2012

Friday Fashion | Spring Pastels


I haven't gushed in a while but I have a serious girl crush on Gwyneth Paltrow. Her weekly goop emails usually inspire me but her take on spring fashion was downright depressing. Everything was crazy expensive! Who buys that stuff?

I re-created my favorite look for us non-movie star/married to a rock star gals. Since I'm not a shorts person I went with a jean skirt - add some edgy earrings and, voila, date night!

Or layer the tanks, grab some fried chicken, and head out for an afternoon picnic. (Yes, everything revolves around food for me these days.)


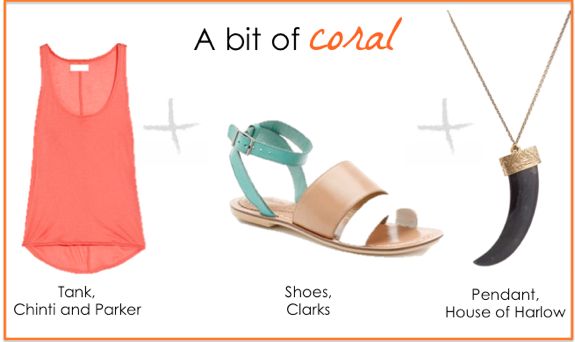
Jacket | White tank | Skirt | Fedora | Earrings | Wedges | Coral tank | Flats | Pendant

Thursday, April 12, 2012

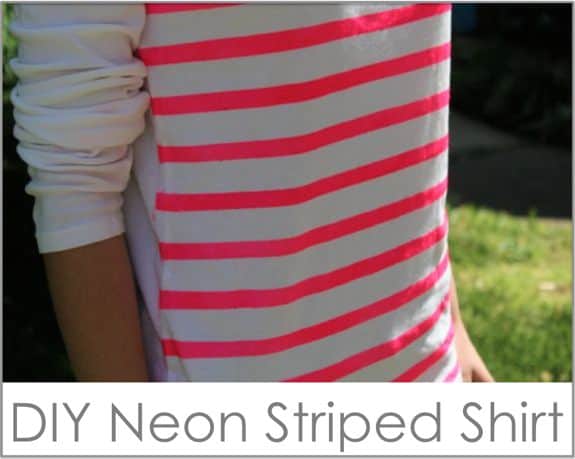
DIY Neon Striped Shirt


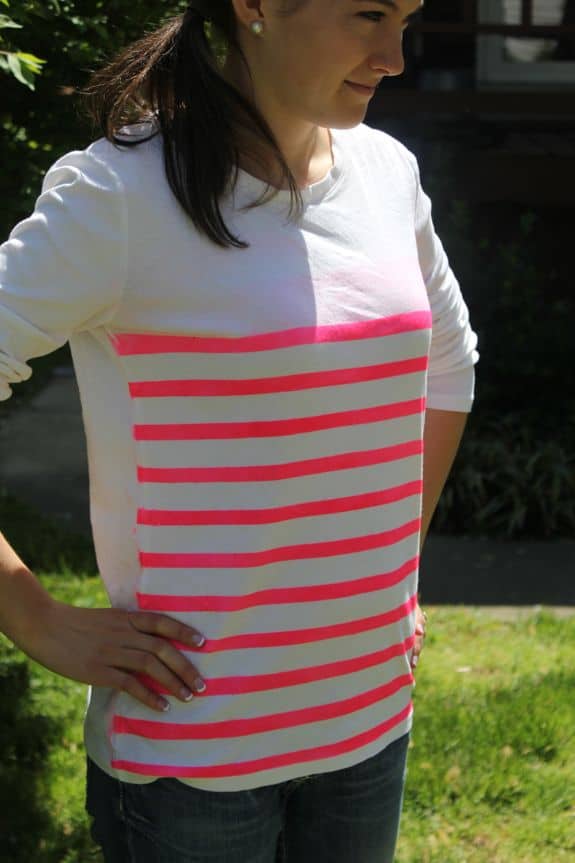
Uh oh folks, I've discovered that I can make my own striped shirts. Me thinks this could quickly become a problem. After spray painting half my yard making a colorful sunhat and some craft fail bobby pins I decided to try making a neon striped shirt instead of boring ol' black.


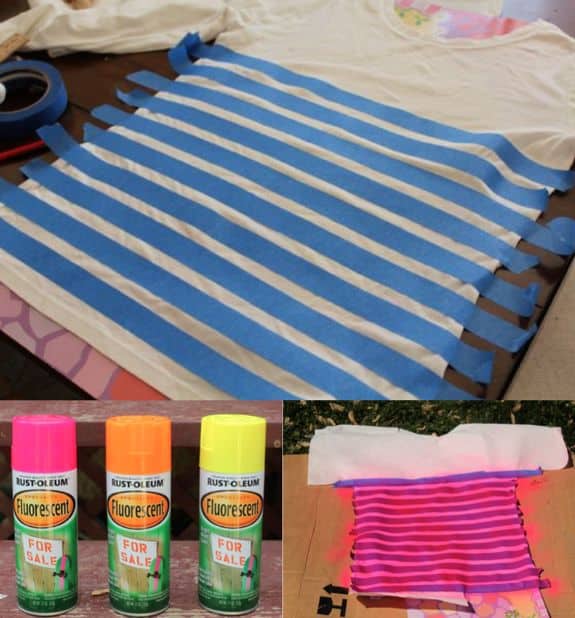
You'll need:
  • T-shirt
  • Neon spray paint
  • Painter's or masking tape
Instructions:

1. Tape off the stripes on the shirt. I measured a 1/2 inch width for the neon stripes and 1 inch width for the white stripes in between (that's how wide my tape was which made it easy). I started from the top and worked my way down.

2. Insert cardboard into the shirt to keep the paint from bleeding through. And tape down paper towels or plastic to cover every part of the shirt you don't want painted.

3. Paint! I gave mine 2 coats, letting it dry in between.


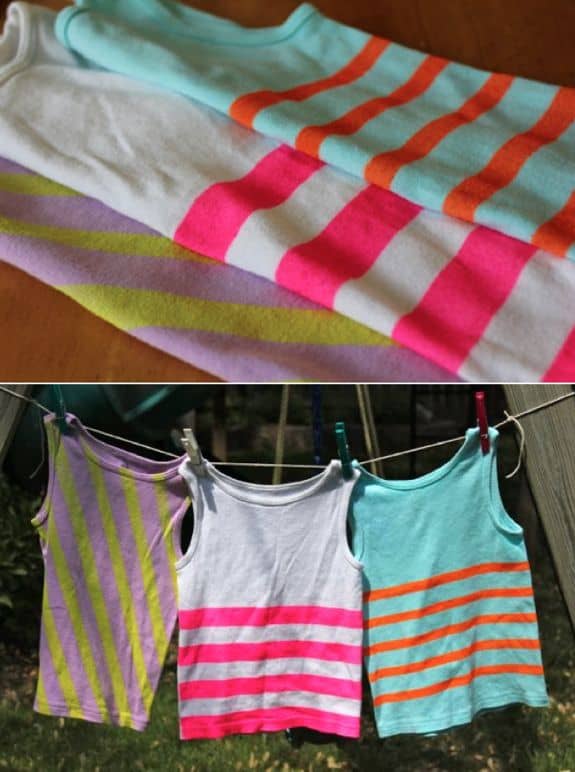
Caroline saw my pink shirt in progress and convinced me to make her one. We had fun adding color to a few of her tank tops.


If you're loving neon as much as I am, check out Andrea's neon inspired DIY week for more fun ideas!

Monday, April 9, 2012

My Style | 6 Maternity Fashion Tips


Well, hello, 34 weeks. I said on Twitter last week that I felt like I'd swallowed a watermelon so maybe green isn't the best color choice? Certain clothes (like this dress) make the belly look even bigger! I get lots of 'Oh, you must be due any day!' which is definitely on the list of what not to say to a pregnant lady.

This will probably be the last belly appearance (it's kind of embarrassing) so I'm taking the opportunity to share a few maternity fashion tips I've learned over the course of three pregnancies.

1. Go for quality versus quantity.

I make this mistake every time. When you're staring at the 5 shirts you've worn over and over for the past 34 weeks, you're going to choose what feels good. Soft, natural fabrics grow better with the belly and wouldn't you know they hold up so much longer. My impulse Target and Old Navy purchases tend to get holes after two washes and shrink way too much.

Gap Maternity has been great for jeans and t-shirts. My best discovery this time around was Isabella Oliver for beautiful dresses and work wear. And I just learned about the HATCH Collection. Wow, I'll take one of everything, thanks.

2. Work your pre-pregnancy closet - to a point.

Yes, you can usually get away with wearing your pre-pregnancy pants for most of the first trimester if you use a Belly Band or something like it. But just like there's no gold medal for delivering naturally, there is no point in putting off the maternity plunge. I had to drag my sister to the maternity store only for her to marvel at the comfort and joy of an elastic waist.

And please don't wear yoga pants for 40 weeks or non-maternity tops that let your belly hang out. Shudder.

3. Find a silhouette that works for you and rock it all the time.

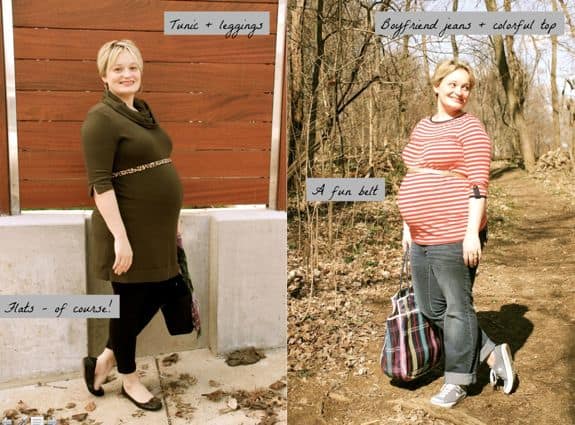
A stylish friend who was pregnant over the winter wore leggings, tunics and boots pretty much every day. And guess what, she always looked amazing. You may be one of the lucky tall, thin girls who looks awesome in skinny jeans. I'm not so I stick with boyfriend jeans with a bright top and comfy flats. Now that the weather is warmer I highly recommend maxi dresses.


4. Don't buy your entire wardrobe all at once.

Trust me, you will get bored and feel compelled to buy more. Trying on maternity clothes will at some point feel much like the horror of buying a swimsuit but I still recommend staggering purchases throughout the pregnancy so you can enjoy new things without going overboard. Plus, what fits at 20 weeks may not feel so good at 35 weeks.

5. Have fun with accessories.

Pregnancy is the perfect time to use accessories to embrace trends. I tend to wear more jewelry and make-up to change up my looks. Rock colorful scarves, stack up an arm party, find animal print flats - this will help with wardrobe fatigue.

Going back to tip #2, mine your pre-pregger closet for things you can wear throughout:
  • Accessories
  • Cardigans
  • Belts (you might have to rig them a bit)
  • Shoes
6. Don't neglect your undergarments.

The pregnancy boob phenomenon is no lie. So get resized or buy a bra expander. And if you're clueless like I was, don't go nuts and buy 5 new bras in your first trimester, especially if you plan to breastfeed. You can also find maternity underwear that fits really comfortably below the belly.

What have you learned about pregnancy style? What tips do you have?


Thursday, April 5, 2012

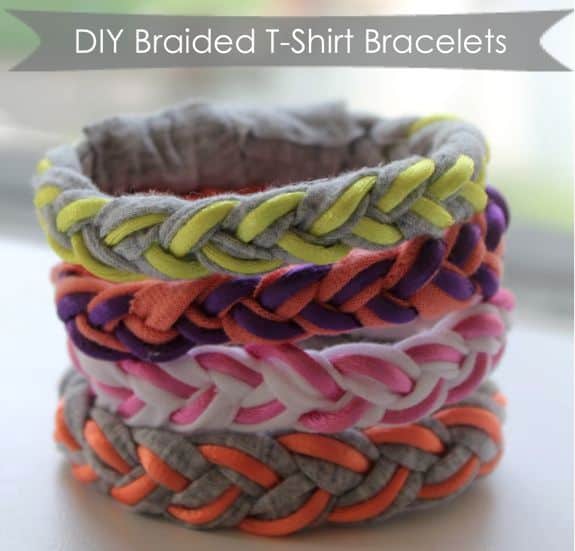
DIY Braided T-Shirt Bracelets


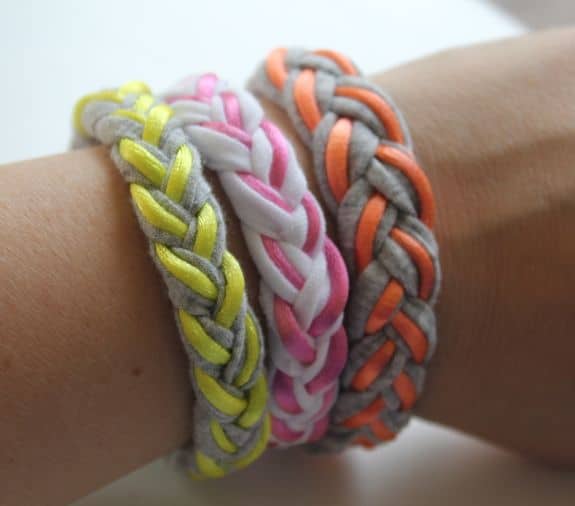
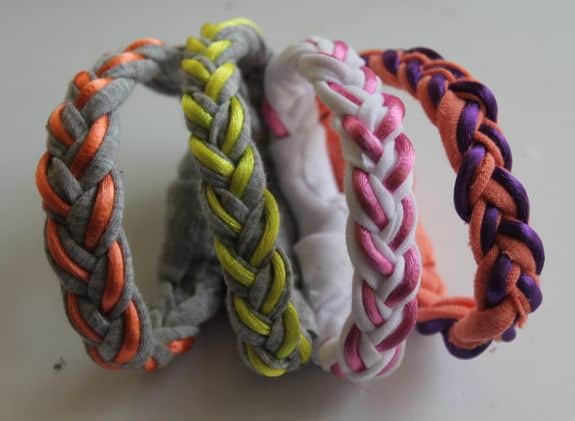
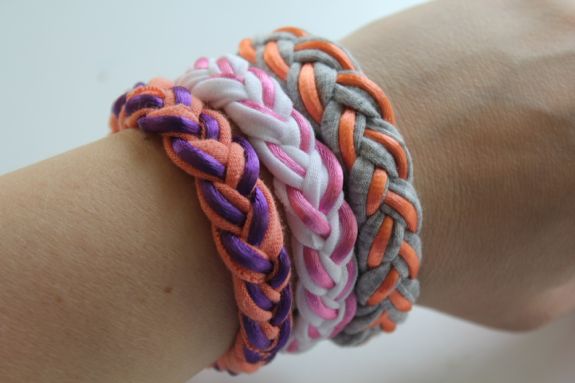
Here's the DIY I promised last night when I got distracted with Henry's fun laugh. I spotted these pretty Roarke NYC braided bracelets in Elle magazine and loved their bright, feminine colors. I wanted a bunch of them to wear stacked on my wrist but $60 each was out of my reach.


I've braided bracelets before - even a necklace - so I figured how hard could this be? Turns out it's pretty easy. Otherwise, let's be honest, I wouldn't have figured it out. And cheap. Yahoo!

You'll need:
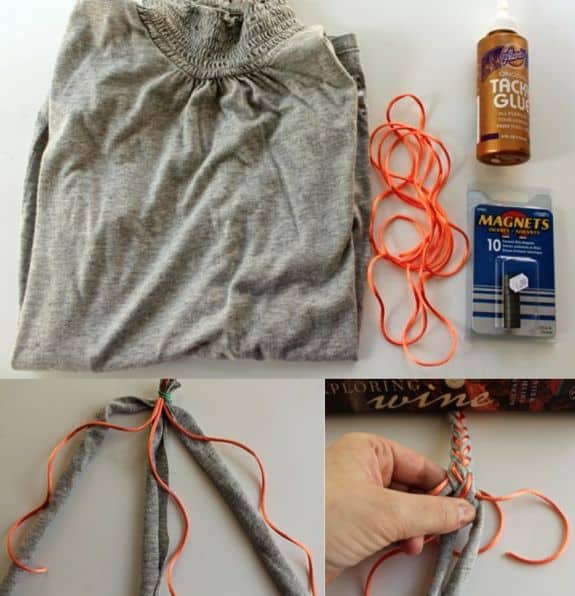
  • Cotton or jersey T-shirt you don't mind cutting up. Or you can pick up a shirt at Goodwill. White and grey make good base colors for pastel or neon cord.
  • 1 yard of rattail cord for each bracelet. You can find lots of fun colors at JoAnn's for 50-99 cents a yard.
  • Magnets. I got a package of 10 for $2.
  • Glue. Either hot glue or tacky glue or both.


Instructions:

1. Cut the shirt into 3 strips roughly 1-inch wide and about 12 inches long. But don't stress cutting this precisely. The ends will roll in so you don't need it to be pretty.

2. Cut the rattail cord into 3 10-inch pieces.

3. Anchor the top with a bobby pin or rubber band, separate into 3 strands, and start braiding.


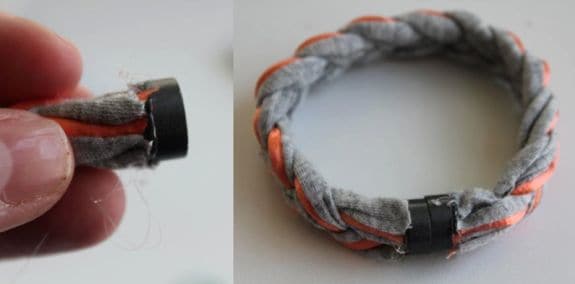
4. When you get to the end of the braid, snip the ends, bunch all of the pieces together, and glue on the magnet.

5. Do the same to the other end. Wrap it around your wrist and make sure you have the right length before attaching the second magnet.

6. Cut two little pieces of fabric to cover over the magnet ends.

7. Fold the fabric over the magnet and glue together.


What do you think? Would you make one? What colors would you use?

Tuesday, April 3, 2012

Simple Beauty | Pineapple Papaya Facial Mask


The last time I had a facial (thank you Groupon) my aesthetician told me I had a lot of sun spots on my cheeks and recommended laser treatments to remove them. Yes, I admit sunscreen was not really a priority as a teenager. My cheeks would ALWAYS burn.

And we won't even discuss the burning/peeling on my chest. What was I thinking??


Before signing up for lasers I did a little online research and found a lovely all natural solution to minimize those blotches and freckles.

Why Pineapple & Papaya?
  • Unripe papaya contains natural alpha-hydroxy acids and high levels of papain, an enzyme that helps dissolve dead skin cells.
  • Pineapple has lots of the enzyme bromelian, which helps remove the outer layers of skin to reduce age spots and wrinkles.
  • Used together, the enzymes and AHAs in papaya and pineapple naturally exfoliate and lighten skin color. Yay!
 

How to Make Your Own Pineapple Papaya Facial Mask

You'll need:
  • 1/2 fresh papaya, peeled and seeded
  • 1 cup fresh pineapple
  • 1 tablespoon honey (optional)
Instructions:

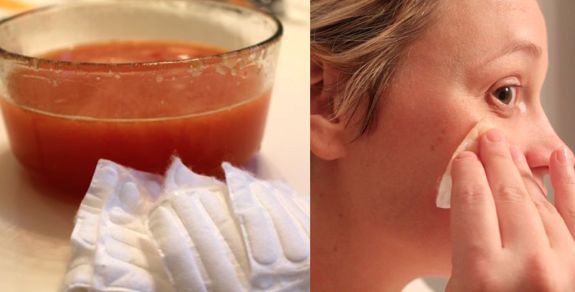
1. Juice papaya and pineapple in juicer if you have one. If you don't have a juicer, you can mash the fruit together or put it in a blender. Strain out the pulp with fine mesh strainer or cheesecloth.

2. Gently wash your chest, neck and face.

3. Use a cotton ball to apply juice to chest, neck and face. Avoid the eye area - yeah, it stings. You can also do the backs of your hands at the same time.

4. Lie down and let it work for 10-15 minutes. It will tingle and itch. This is the AHAs working so try not to scratch.

5. Rinse with warm water and moisturize. Again, I highly recommend coconut oil.

You can do this mask 1-2 times a week. And if you have extra juice, it will keep in the refrigerator in a closed container for a week.

If you want to try another easy mask (also from the kitchen) try this one with turmeric.