-->

This Page

has been moved to new address

henry happened

Sorry for inconvenience...

Redirection provided by Blogger to WordPress Migration Service
henry happened

Monday, August 27, 2012

25 DIY Bracelet Tutorials
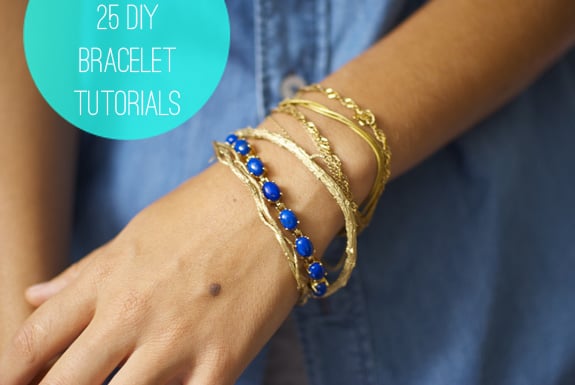

One of my very first tutorials was a braided bracelet - and with that my love of a good DIY was born. Bracelets are especially close to my heart because they are usually fast, simple and easy to wear. What more could you ask for? Read on for 25 of my favorite bracelet projects.

Continue reading...

Tuesday, August 14, 2012

25 DIY Flower Projects


My favorite Saturday morning ritual is visiting the farmer's market to pick up bunches of wildflowers. The bright colors are a cheery way to start day! I've been wanting to learn more about flower arranging, so I started a Pinterest board ... and the next thing I knew I had wasted 2 hours going down the rabbit hole of flower related crafts. You guys seemed to like the 25 Hair DIYs so here are 25 (plus a few bonus!) flower projects to add to your to do list.

Continue reading...

Thursday, May 17, 2012

 
I've been having a thing for neon lately - especially yellow. Looking through my Pinterest "likes" it seems that almost all of them include my new favorite color! So when I saw this Asos ring I thought it would be fun to dip into my (ever growing) clay stash to re-create my own neon ring. A simple statement accessory is a great way to get in on the neon trend.  

What you'll need:  

1. Neon colored clay  

2. Square or circle rings with recessed base. Both available at major craft stores. I found the square ring in the same aisle as the clay. 
3. Glue

Instructions:  

1. Knead the clay in your hand until it softens. Then turn over your ring and press into the clay.


2. Cut out the shape with a smooth knife and trim until it fits into the ring. Bake according to clay package directions.  

3. When it comes out of the oven, make sure it easily fits into the ring. While it's still hot you can trim to fit if needed.

4. Once it cools, glue into place.  

The result!
 
Aak! Does my hand seriously look like that?
 

Because I love short hair bling, I made a few neon bobby pins as well. I didn't really wait for the glue to dry before taking pictures (I'm a little impatient) but the Tacky Glue dries clear and does a good job of holding. You can also use E-6000.  

For more fun with clay, check out this necklace or these colorblock bracelets.

Wednesday, May 9, 2012

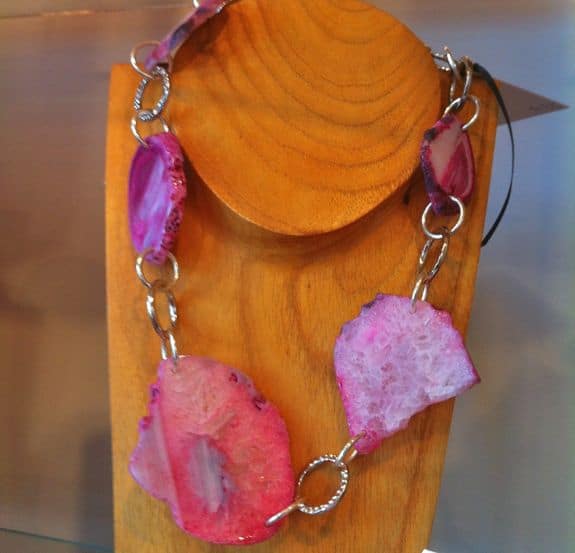
DIY Pink Stone Necklace


I'm having a thing lately with pink necklaces (like the one I wore yesterday), and I recently snapped a photo of this pink stone necklace at a local jewelry shop. The shades of pink are so gorgeous - but the $100 price tag was more than I could justify.

Then I happened to be at JoAnn's on an unrelated jewelry mission and found some amazing stone beads. And they come in great colors - I got pink and purple and they also had blue and turquoise. And guess what, they were only $9! I swear I've seen almost the exact same stone beads for more than $40 at other bead stores - so get yours fast!  

What you'll need:  

1. One strand of stone beads in the color of your choice. Note: The above strand is how the stone beads come. They will already be attached via large jump rings.  

2. 7 large jump rings. These also came from JoAnn's.

 3. Jewelry chain. I used about a foot of chain I had on hand. You can find all kinds of styles at JoAnn's while picking up your beads.  

4. Pliers. Not absolutely necessary but helpful.  

Instructions:  
1. Open the jump rings between the stones and insert one of the new large jump rings.  

2. Decide how long you want the necklace and cut your length of chain. 3. Attach the chain to the end of the stone strand with jump rings. You won't need a closure because the necklace will fit over your head. 

Result!


Monday, May 7, 2012

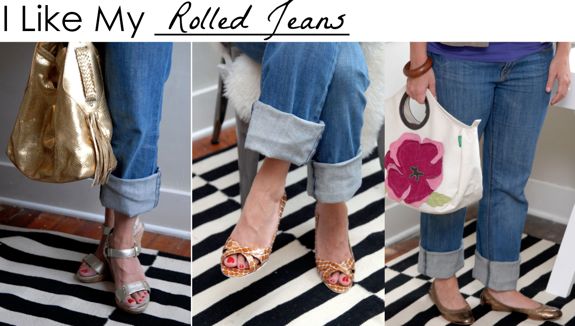
Sister Re-Style | 4 Ways to Wear Rolled Jeans

 
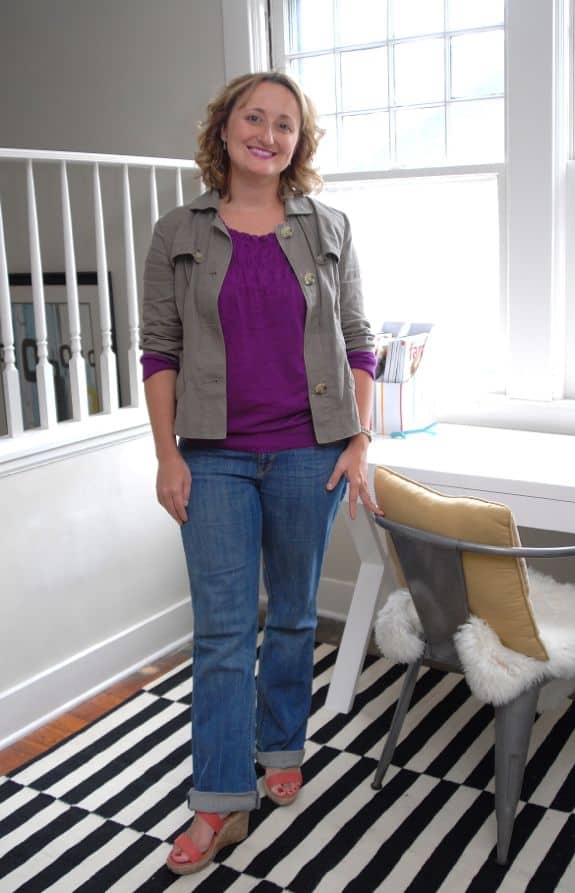
My gorgeous sister Susanna recently came to visit, and we couldn't resist a bit of dress up. Below is a typical casual Saturday look, and while I love the purple top and coral wedges, it completely hides her figure (and the shoes). I thought I'd share the four ways we re-styled the look using the tops she brought and her rolled jeans as a base.  

BEFORE: Cute but hides the figure - and the shoes!  
Susanna knows that jewel and earth tones look great on her but (like me) struggles with how to take the outfit to the next level with accessories. As a mom, I think it's hard to add the bit of "drama" that turns a basic casual look into something special. So it was fun to play around with bold accessories and see how they changed up the look. And doesn't she look great in purple lipstick?!

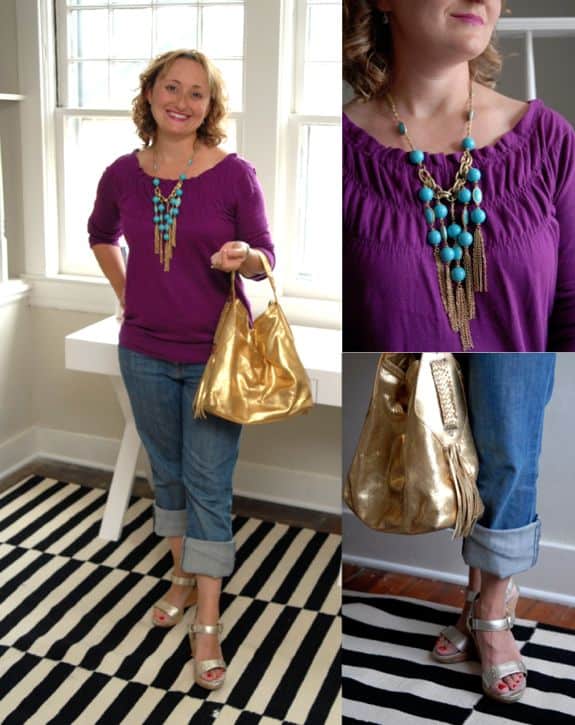
Outfit 1: Statement Necklace and Glam Wedges  
Outfit 1: First, we hiked up her rolled jeans to show off fun gold wedges. As a short girl, I'm always worried that rolling my jeans will cut off the leg line and make me look shorter. But I think the key is making it clear you deliberately rolled the jeans. Make it obvious! Stay away from a tiny, my-pants-are-too-long roll like in the before shot.  

Outfit 2: Bold Pink and Coral Wedges  
Outfit 2: We had to show off her adorable coral wedges! But I love how great it looks paired with a casual T-shirt and pink accessories - not a color combination Susanna would normally wear. Super fun and easy for a casual Saturday. 

Outfit 3: Casual tank top and flats  
Outfit 3: You can wear rolled jeans with flats and still look pulled together! We switched out the shirt to a more figure hugging tank top that can be worn with or without the jacket. I swear tank tops are the most versatile clothing item I own. They are light weight enough to wear under a jacket or you can layer two tanks of different colors together.  

Outfit 4: Dress it up with heels  

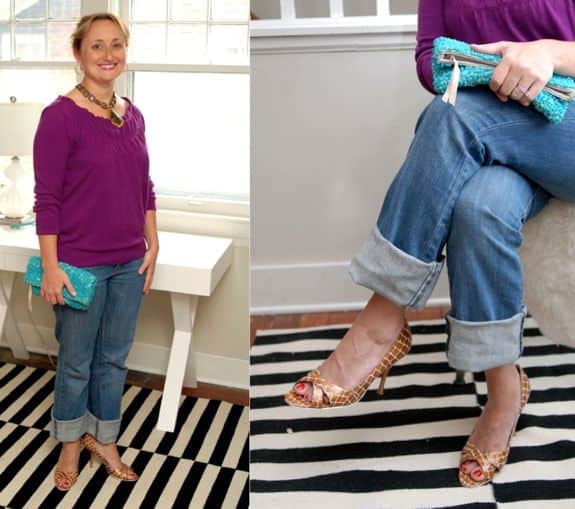
Outfit 4: I love the look of rolled jeans with a great pair of heels - it feels like an easy dose of sexiness when you're not wearing a dress. You can take a day look to night just by switching to heels, pulling up your hair and adding a sparkly handbag.  

What closet basics do you re-style all the time? Are you a fan of the rolled jeans? (I admit I am - and not just because I'm short and ALL of my pants are too long.)

Tuesday, April 24, 2012

DIY Bobby Pins - Neon, Glitter and Sparkle


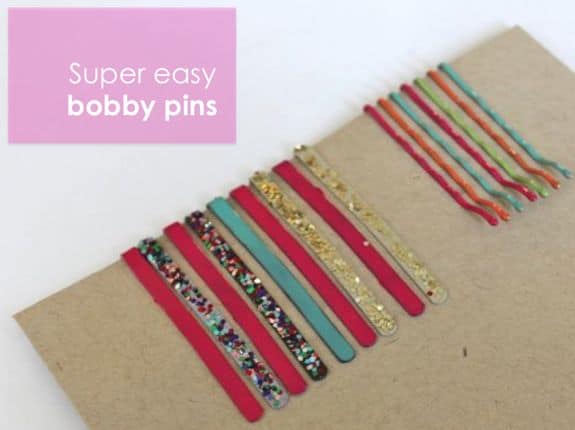
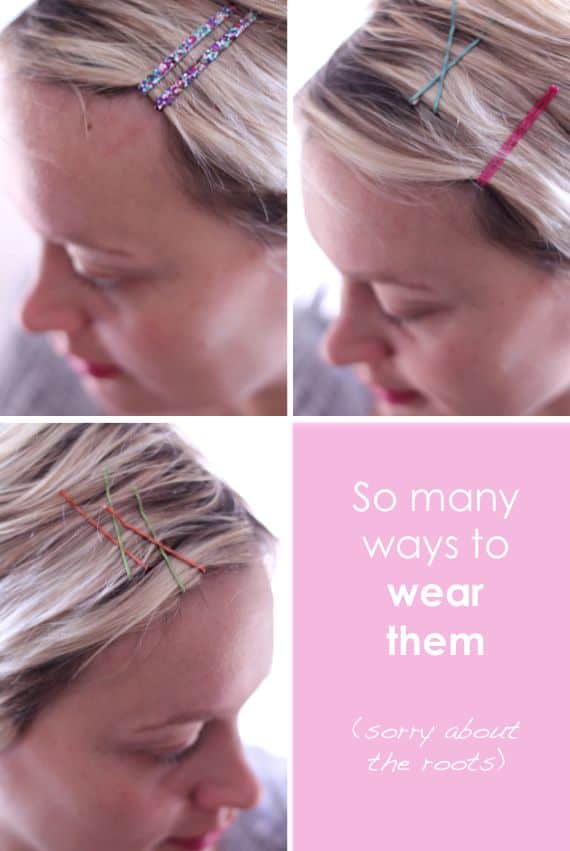
With so many fun bobby pins floating around (see here or here) I was determined to DIY some colorful ones for myself. For those of us with crazy short hair, blinged out bobby pins is where it's at.

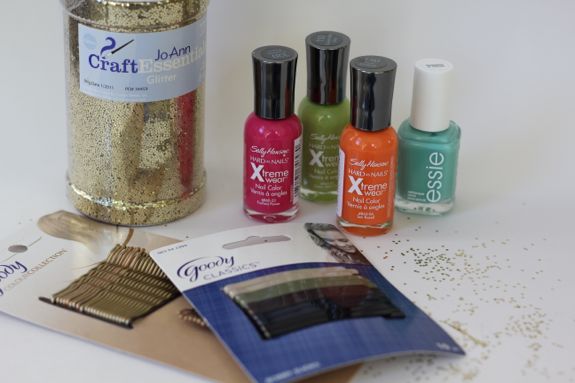
When spray paint didn't work I used Anna's idea of painting with nail polish. Voila! And one you get started painting these little guys, you get addicted! So I made three versions - neon, glitter and sparkle.


Instructions are super easy.

For neon:  

1. Slide the bobby pins onto cardboard or paper to make them easier to paint. Otherwise they fall over pretty easily, making them hard to paint. Learned this one the hard way.  

2. Paint two coats of neon nail polish, drying in between.

3. Apply top coat (optional).  

4. You don't need to to paint the back of the bobby pin - once it's in your hair no one will see that part.


For glitter:  

1. Paint the top of the bobby pin with clear polish. Or you can use Mod Podge.  

2. Make a little pile of glitter and dip the top of the bobby pin in.  

3. Let dry and apply another coat of polish or Mod Podge.


For sparkle:  

1. Glue on a strip of rhinestone trim the length of the bobby pin. I used Tacky Glue because it dries clear.  

2. Wind any kind of trim between the rhinestones. I used what I had on hand - neon rope from Home Depot and mint colored crochet thread.

 3. Glue the ends of the thread and snip off any excess.


Monday, April 23, 2012

Momiform | Hospital Outfits


We were in major "get ready for baby" mode this weekend. Henry's room is almost ready for a roommate (can't wait to show you!) and I think we have everything we need. By the way, it's amazing how much LESS stuff we've purchased for baby #3. Being the planners that we are, we gave away most of our infant equipment - swing, Bjorn, bouncer, etc - and most of it we've realized we don't need. Or we bought it used or borrowed this time around.  

Now to get ready for the hospital...

I am the worst at planning ahead for this kind of stuff. Hence zero in-hospital pictures of me with either of my kiddos. This time around I'm determined to get a decent photo of me and the baby.  

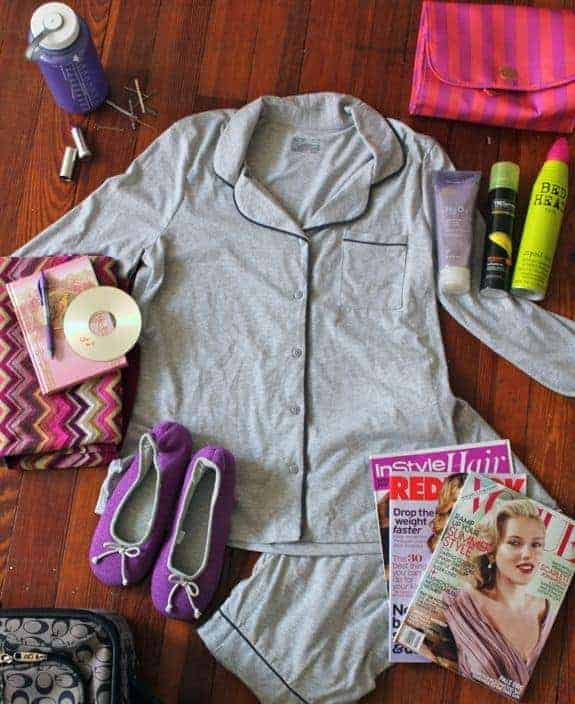
In-hospital outfit:
  • Button up pjs - Oh so nice to wear something comfy that is also breastfeeding friendly.
  • Slippers - For making the waddle to the bathroom at 2 a.m. a little easier.
  • Labor mix CD - Mark made this for Caroline's birth, and the doctor remarked that she'd never delivered to Madonna before.
  • Dry shampoo, lipstick, bobby pins - My day 2 camera ready plan.
 

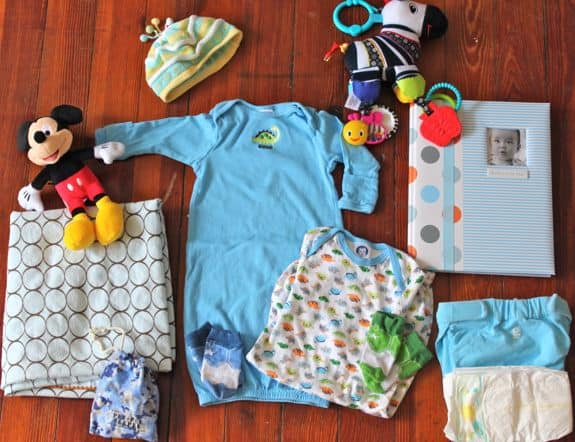
Packing for baby: Baby doesn't really need much at the hospital because I love the little hat and burrito blanket they keep baby in. But you need a little something for photos and going home.
  • Baby book - I'm terrible at keeping up with baby books but those little footprints are a must.
  • Gifts from siblings - The kids had a blast picking out a little something for the baby this weekend. I want to pack them to make sure I have them on hand when they visit.
  • Favorite blanket & gown - I've never been a big fan of grown-up looking going-home outfits for a 2-day old. These are my favorite baby gowns and swaddling blankets that I give to every new mom I know - they are life savers!
 

Going home outfit:
  • Favorite maternity outfit - It's so depressing to come home in maternity clothes. I'm so sick of them all that I want to have a bonfire in the backyard. But this is my most comfortable go-to.
  • Nursing tanks - I will live in these Target tanks for the first year.
  • Red lipstick - All the glam I need!
Other hospital must haves:
  • Camera - not pictured (in use!)
  • Goody basket for nurse staff - I always mean to send a thank you to the nurses and, of course, get home and lose my mind. This time I'm bringing an easy muffin/fruit concoction with me.
  • Champagne - Definitely a must for toasting the new arrival.
What am I forgetting? Let me know what worked for you!