DIY Puffy Bead Bracelets | Guest Mom Kelly
I'm very excited to be here today!! My name is Kelly, and I write a fun little DIY blog called Running With Glitter.
I'm a mommy to two littles and a wife to one cool CPA. I try to include my children in my crafting as much as possible. So you will find lots of family friendly recipes and projects over at my blog.
 This is me and my daughter Aubrey Rose. {you would never know that she was a micro preemie born at 26 weeks!} She was the inspiration for the name of my blog. We were making Christmas ornaments and she ran thru the house with a glitter shaker, and it went everywhere. I said in my mommy voice, "No running with glitter."
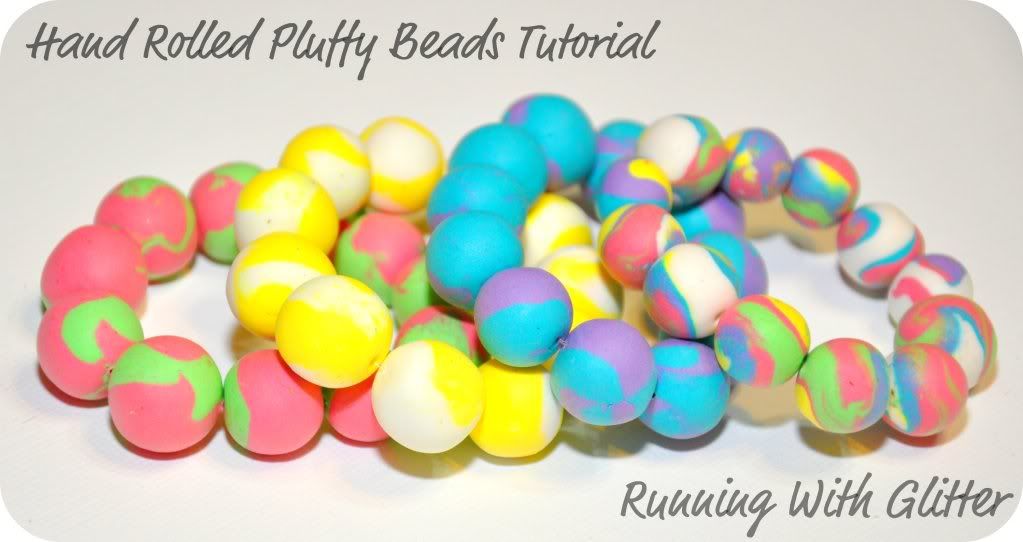
Today I'm going to share a fun project with you - Puffy Bead Bracelets!
I have been wanting to try my hands at making clay beads for a while.
Working with Polymer Clay is super intimidating to me. Pluffy Clay was the perfect ingredient for a first timer. It is light and very forgiving, not too messy and does not dry out until it is baked. {love that I can leave it out overnight and it is not dried up the next day}
I think that I just may be hooked on making beads. I really love Pluffy clay and it was a great for my kids to play with while I worked on making Aubrey Rose's bracelets.
Supplies Needed:
- Pluffy Clay (found at most craft/hobby stores)
- Wax Paper
- Stretch Magic
- Toothpick or Needle
- Super Glue
How to make your beads
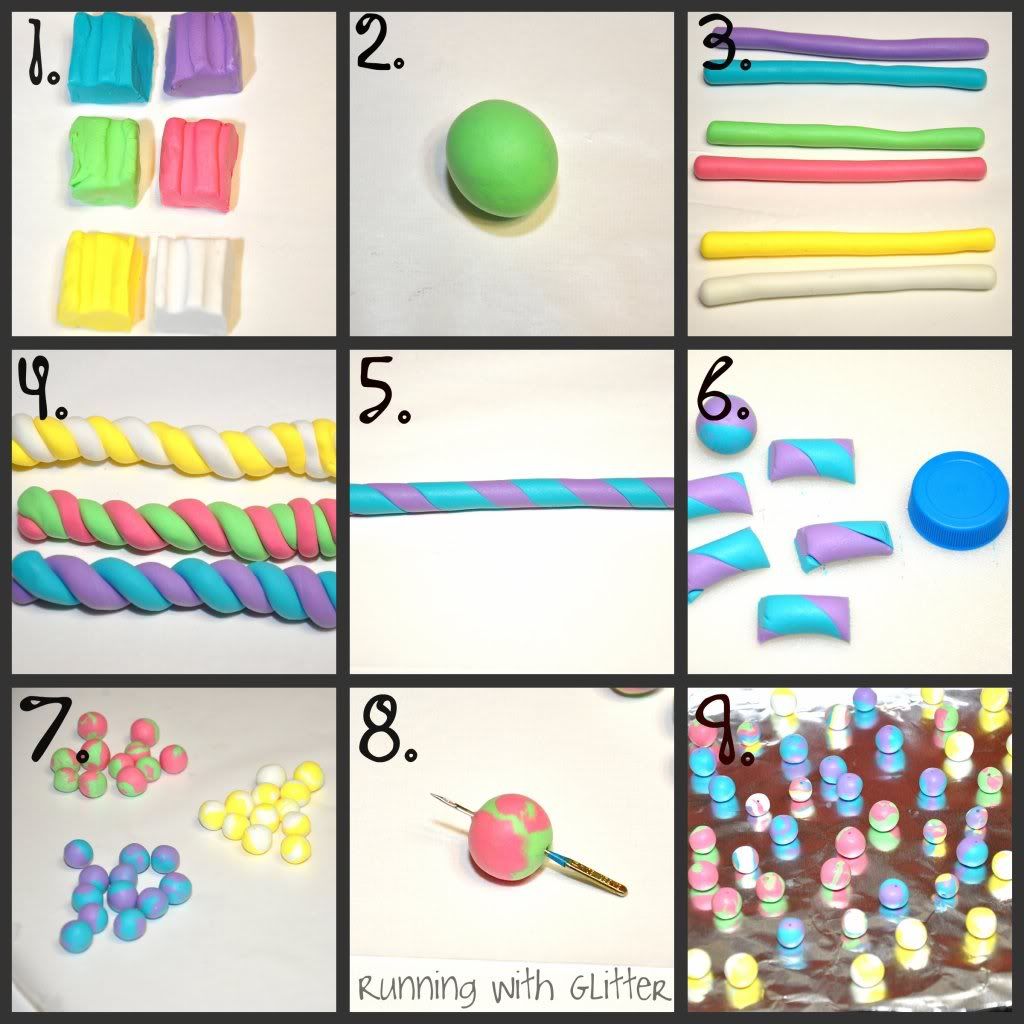
1) Cover your work surface with wax paper and cut even squares of your clay {this clay will stain}
2) Knead your clay until soft then roll into a ball.
3) Roll each ball into an even snake/tube :)
4) Take two colors press them together firmly and twist
5) Roll both clays together just like you did in #3
6) Cut even pieces of your clay. I used a bottle cap as a size guide.
7) Roll into even balls. The balls were too big at first so I halved each one and re-rolled.
8) Use a toothpick, child's sewing needle or sewing machine needle and make a hole big enough for your Stretch Magic to fit thru. I like to use an old sewing machine needle because it makes the perfect hole for .5mm Stretch Magic and is easy to hold onto.
9) Place on foil and bake according to manufacturer's instructions. Let cool.
10) String your beads on the Stretch Magic. Tie your string in a knot and add a dab of super glue to the knot. Slip a bead over your knot to hide it. TADA!

These turned out great! I hope you will have as much fun as I did making them!
I hope you will stop by Running With Glitter and say hi sometime!


0 Comments:
Post a Comment
Subscribe to Post Comments [Atom]
<< Home