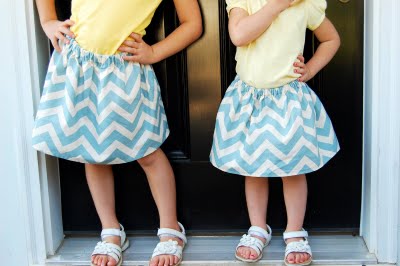
Easy Skirt Tutorial {Guest Post}
Lindsay is sharing a tutorial for the most adorable skirt. Her wonderfully easy sewing how-to's inspired me to buy a sewing machine. Now I just have to get it out of the box! Go check out all of her fantastic projects at Southern Lovely! xo Stephanie

Hello there! I am so excited to be here, guest posting on one of my favorite blogs! Stephanie has amazing style and some of the most fantastic ideas!
I'm Lindsay, and I blog over at Southern Lovely. I love to create anything & everything - sewing, crafting, painting, you name it, I'll try it. :)
Today I am going to share a tutorial for one of the easiest pieces I've ever created. Here we go...
I've had this fabulous chevron fabric, just waiting to be used. So I did an online search for 'easy skirt tutorial', and this was the first one that came up. It was just what I wanted - and SUPER easy. I will definitely be making more of these, and maybe even one for myself. :)
Want to make one too? Here's how...
To determine the width of your fabric measure the waist of whomever you are making the skirt for, then double it. (My 5 year old has a 21 inch waist, so I cut 42 inches for the width).
To determine the length, measure where you'd like it to end, then add 1 1/2 inches. (I cut 15 inches for my 5 year old).
Your elastic needs to be 1 inch bigger than the actual waist size (so I cut 22 inches for my 5 year old). Pretty easy right?
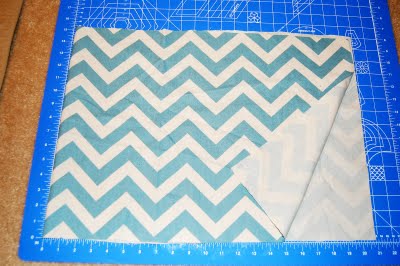
Once you have determined the width & length, it's time to cut!

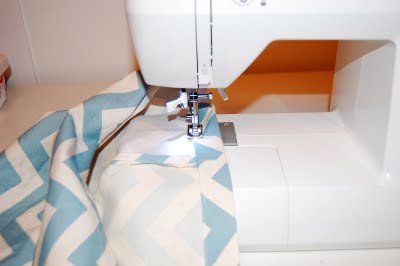
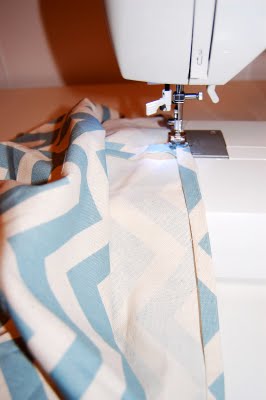
Place right sides of your fabric together & sew a 1/4 inch seam all the way down.
Iron open your seam so it lays nice & flat.
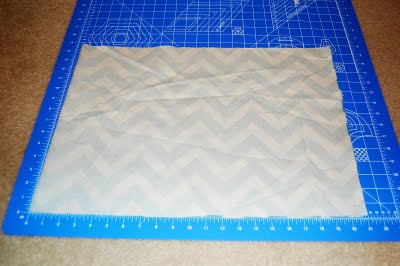
Flip right side out and iron over 1/4 inch (you can do this on both ends, since they will both eventually need this).
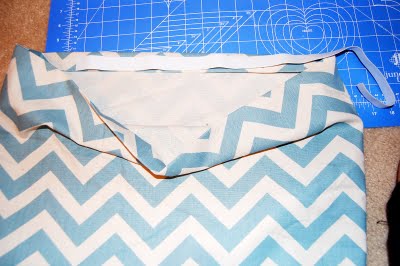
For the top, fold over again & press (use your elastic as your guide to see the width of the fold over). I added 1/4 inch on each side of the elastic, since I knew I would be making a seam above & below it.
Now make a seam on the top & bottom of the part that you just rolled over. Make sure you leave a 2 inch opening to be able to slide the elastic through.
This is what it should look like.

Next you'll need to use a safety pin on one end of the elastic, and then pin the other end to the fabric so it will stay in place. Now thread it through.
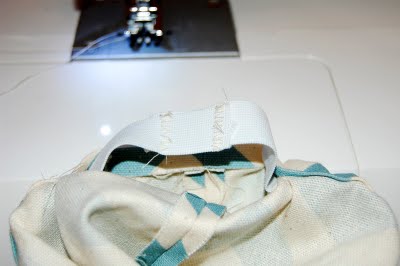
Once it is threaded through, overlap the two ends of the elastic about 1 inch, and sew them together. I did two zigzag stitches to make sure they wouldn't come apart.
Place the elastic back in the casing, and sew the opening closed - make sure you pull it tight when you sew it back together.
Time to hem the bottom - remember how I told you to iron over the bottom part 1/4 inch, if you haven't already done that, do it now. Then fold over again as much as you'd like - I did 1/2 inch. Press & then sew.
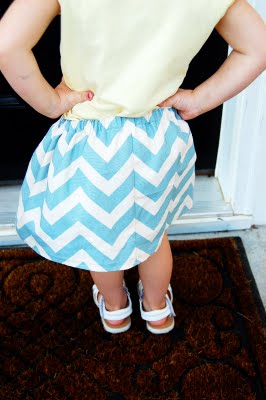
And that is it! Easy, right?? These little skirts turned out SO adorable, and actually look really impressive! I can't wait to make more very soon!

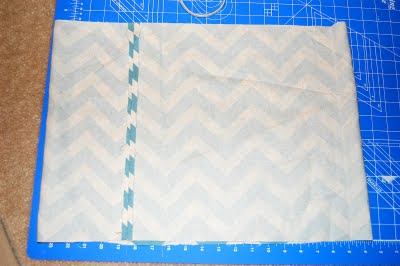
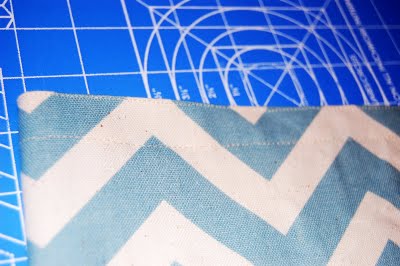
The back seem looks like this.

Here's a close up of the casing.
Happy sewing!

posted by Stephanie @ henry happened @ 11:00 PM
0 Comments
![]()
![]()


0 Comments:
Post a Comment
Subscribe to Post Comments [Atom]
<< Home