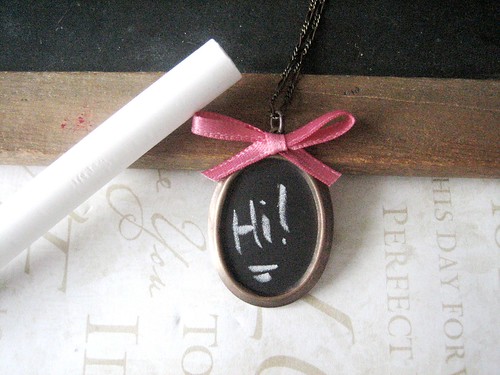
Hello dear friends! I have a DIY to share. Today, I am going to show you how you can make a sweet, miniature chalkboard necklace. This necklace would make for a super fun (any occasion) gift, as you can include just about any message your heart desires on the chalkboard. Some ideas to get the brain cells moving...get well, bff, love, a special date, initials, a sweet simple "hi"!...you get the drift!
{wouldn't it make the perfect gift for a teacher!?}
Without further ado...let's get crafting!
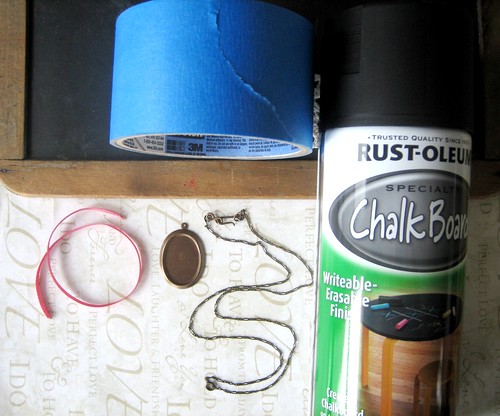
What you'll need:
- Rust-oleum specialty Chalk Board spray
- a bezel pendant (you could find one at your local bead store or even purchase one through Etsy...this or this would do nicely)
- finished chain
- a scrap of satin ribbon
- glue (I highly recommend a tube of E6000, it is inexpensive, amazingly strong and long lasting!)
- painter's tape
- newspaper
- basic white chalk
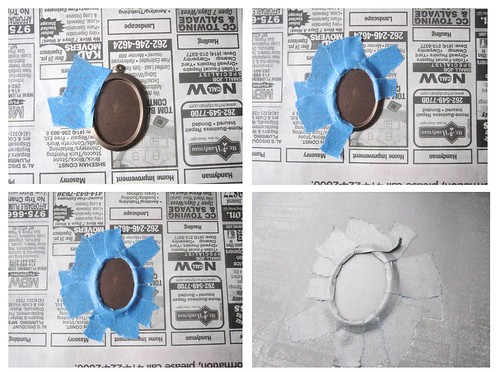
STEP 1: Using the painter's tape, tape your pendant down onto your newspaper being careful to cover any areas you don't want "chalk boarded" with the tape.
STEP 2: In a well ventilated area (i.e. outside) apply 2-3 light coats of "Chalk Board" spray to the exposed surface of the pendant (wait approximately 3-4 minuets between coats). Let dry.
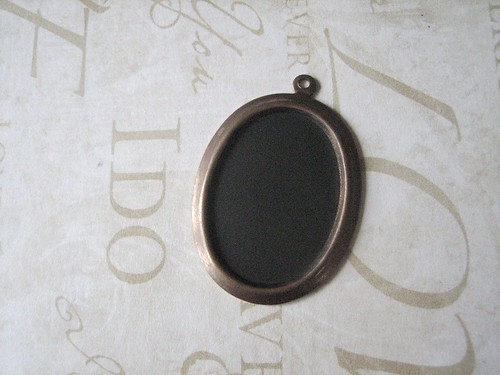
STEP 3: Once the "Chalk Board" finish has had time to thoroughly dry (a couple of hours or so should be suffice), carefully remove the protective painter's tape from the pendant.
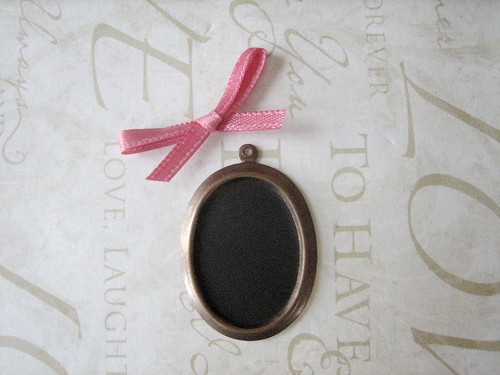
STEP 4: Tie a bow with your ribbon. Trim ends to desired length.
STEP 5: Using your glue, secure bow to top of pendant.
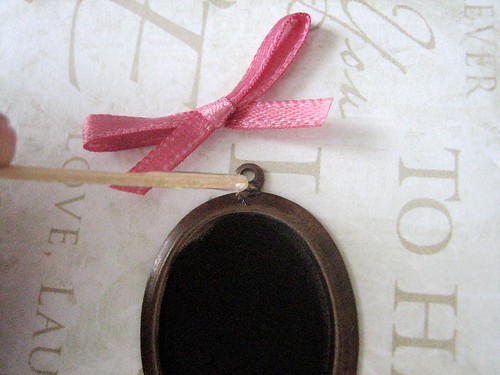
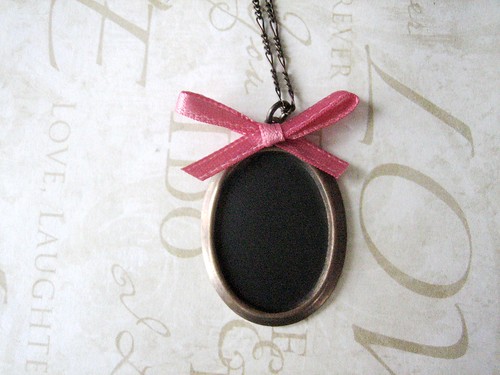
STEP 6: Attached pendant to chain.
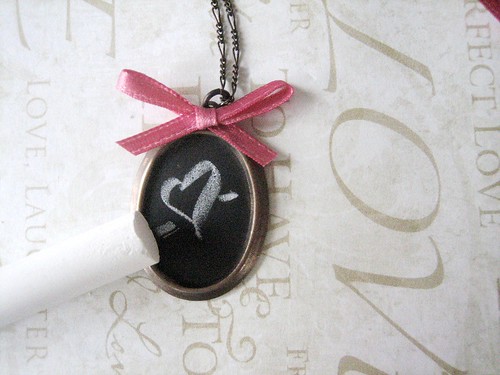
STEP 7: Using your chalk write the message of your choice onto the pendant (using the edge of a brand new piece of chalk will help you write small and clearly).
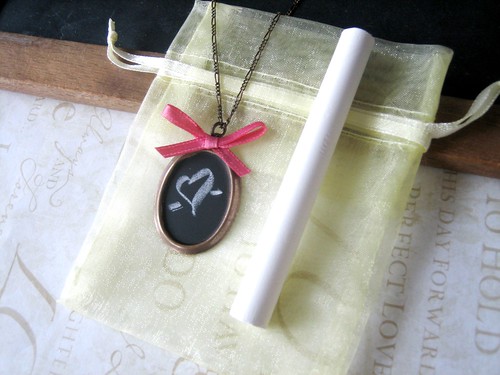
STEP 8: If you are giving as a gift, place pendant and a piece of chalk into a gift bag (I chose an organza gift bag with a bit of a shimmer in a fun, bright color).
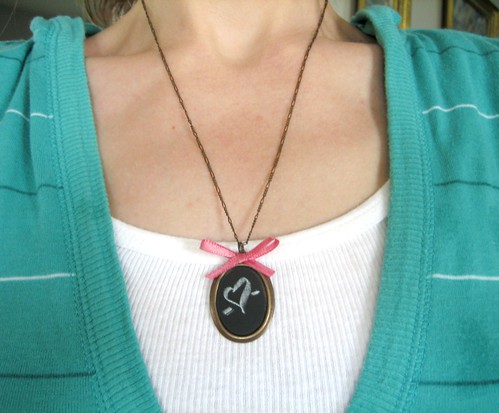
Voila, a sweet chalkboard necklace!
What do you think friends, will you try this? Warning, you may very well become addicted to adding chalkboard finishes to just about anything (that chalkboard spray is really slick and it works on a multitude of surfaces!).
xx
Cat
{love this project but not the "diy" part? you can purchase a
completed chalkboard necklace in the
shop}


0 Comments:
Post a Comment
Subscribe to Post Comments [Atom]
<< Home